1. Introduction: Unlocking the Potential of Circular Embroidery
Circular embroidery is more than just a decorative flourish—it's a gateway to boundless creativity across quilting, apparel, and home décor. From the hypnotic beauty of concentric circles on a quilt to the playful pop of round appliqués on a tote bag, mastering circular embroidery opens up a world where geometry meets artistry. This guide will walk you through the essential tools, like the BERNINA #83 attachment, and foundational techniques that transform your sewing machine into a precision instrument for flawless circles. Whether you're seeking to embellish a table runner, experiment with layered textures, or simply add a new dimension to your projects, you'll discover the core methods, setup tips, and creative applications that make circular embroidery an indispensable skill for every modern embroiderer.
Table of Contents
- 1. Introduction: Unlocking the Potential of Circular Embroidery
- 2. Essential Circular Embroidery Attachments: Setup and Operation
- 3. Advanced Techniques for Circular Machine Embroidery
- 4. Creative Applications in Quilting and Home Décor
- 5. BERNINA #83 Attachment: Expert Tutorial Guide
- 6. Stabilization and Material Science for Perfect Circles
- 7. Attachment Comparison: Features and Value Analysis
- 8. Conclusion: Elevating Your Circular Embroidery Craft
- 9. FAQ: Solving Common Circular Embroidery Challenges
2. Essential Circular Embroidery Attachments: Setup and Operation
Perfect circles aren’t just a matter of luck—they’re the result of the right tools, careful preparation, and a dash of technical know-how. Let’s break down the essentials, from the mechanics of attachments to the fine art of flawless stitching.
2.1 Understanding Attachment Mechanics and Compatibility
Circular embroidery attachments, like the BERNINA #83, transform an ordinary sewing machine into a geometry wizard, outperforming traditional embroidery hoop frames. Think of these attachments as a compass for your fabric: a sliding rule mechanism with a central positioning pin establishes your circle’s radius, allowing you to stitch circles and semicircles with mathematical precision. The BERNINA #83, for example, creates circles from approximately 3 to 10 inches in diameter, and its adaptability means it fits a wide range of BERNINA machines. Other brands offer similar tools, some reaching up to 15-inch circles, so there’s likely an attachment to suit your machine and your creative ambitions.
Compatibility is key. For BERNINA, installation is straightforward: the attachment screws directly into the machine’s bed, and the central pin—secured with a protective cap—anchors your fabric at the exact center. The attachment can be positioned to the right or left of the needle, letting you choose clockwise or counterclockwise stitching. It’s designed to work with various presser feet, including open-toe and clear embroidery feet, which means you can experiment with decorative stitches, couching, or even circular lettering.
The magic lies in the radius control principle. By adjusting the distance from the pin to the needle, you set your circle’s size—no freehand guesswork, just smooth, repeatable results. This system is what elevates your sewing machine from a straight-line workhorse to a circular embroidery powerhouse.
2.2 Fabric Preparation and Stabilization Protocols
A flawless circle starts before the first stitch. Proper fabric preparation and stabilization are the unsung heroes of circular embroidery.
Begin by cutting your fabric at least 3 inches larger than your intended circle—this extra space gives your fabric room to rotate freely without bunching or distortion. Stabilization is non-negotiable: apply a fusible or cut-away stabilizer to the fabric’s wrong side, using basting spray or an iron-on product to bond the layers securely. For high-density or stretchy fabrics, double or even triple layers of stabilizer may be needed to maintain structure.
Marking the center point is crucial. Fold your stabilized fabric square in half both ways and finger-press the creases to find the exact center. Attach the fabric, face up, to the attachment’s pin at this center point, and secure it with the provided cap to prevent shifting. This ensures your circle will be perfectly placed and remain stable throughout stitching.
Set up your workspace with an extension table if possible. A large, flat surface supports the fabric as it rotates, minimizing drag and keeping your stitches even. Some users even recommend a touch of painter’s tape to keep layers from slipping during intricate work.
2.3 Stitching Techniques for Flawless Circles
Stitch Selection: Circular attachments let you use both utility and decorative stitches. Want a simple outline? Use a straight stitch. Looking for flair? Try a zigzag, a programmed decorative motif, or even circular lettering. For decorative work, use embroidery thread in the needle and match the bobbin thread for a polished finish.
Needle Choice: Precision matters. Fine needles—like Microtex size 70 or Embroidery size 75—are ideal. They’re sharp and thin, minimizing fabric damage and ensuring clean, crisp stitches, especially on delicate or densely woven materials.
The Stitching Process: Once your fabric is anchored, the attachment does the heavy lifting. The fabric rotates smoothly around the pin—your job is simply to keep it flat and let the feed dogs guide the motion. Resist the urge to push or pull; the machine will feed the fabric in a perfect circle, maintaining even tension and stitch formation.
Finishing Touches: As you approach the end of your circle, slow down and align your stitches for a seamless join. If you’re using decorative patterns, pause before the last repeat to adjust length or density so the pattern matches up perfectly.
Pro Tip: Always test your setup on a scrap before diving into your main project. Adjust stitch length, width, and tension as needed to achieve the look and stability you want.
Practical Applications: Circular attachments shine in projects like trivets, quilt blocks, and decorative embellishments. They’re also fantastic for adding corded accents or couching yarns in perfectly round motifs. With a little practice, you’ll find yourself reaching for this tool whenever you want to add a touch of geometric magic to your work.
3. Advanced Techniques for Circular Machine Embroidery
Ready to level up? Circular embroidery isn’t just about perfect outlines—it’s a canvas for layered appliqué, dimensional fills, and show-stopping decorative effects.
3.1 Mastering Appliqué and Reverse Appliqué Methods
Circular appliqué is all about crisp edges and creative layering. There are two main methods: direct appliqué and reverse appliqué.
Direct Appliqué: Start by layering your appliqué fabric (right side up) over your stabilized background fabric, both cut at least 4 inches larger than your finished circle. Secure the stack with pins or basting spray. Use a straight stitch (about 2.5 mm length) to outline the circle, following the attachment’s path. Once stitched, carefully trim the excess appliqué fabric close to the stitch line using small, sharp scissors—duckbill appliqué scissors work wonders here to avoid nicking the background.
Reverse Appliqué: This method flips the script. Place the background fabric on top, with the appliqué fabric and stabilizer beneath. Stitch the circle as before, then trim away the background fabric inside the stitch line, revealing the appliqué fabric below. The result is a windowed effect that adds depth and surprise.
Finishing Edges: Both methods benefit from a wide satin stitch or decorative border to cover raw edges and give a professional finish. For best results, use a stitch length of about 6.0 and width of 0.4, and consider a double pass for full coverage.
3.2 Curved Fill Stitches and Decorative Effects
Circular embroidery is the perfect playground for advanced fill techniques that add texture, movement, and visual intrigue. Experiment with free machine embroidery designs to explore these advanced techniques.
Contour Fills: These stitches follow the natural curves of your circle, creating organic, flowing patterns that mimic the play of light and shadow. Use them to give your circles a sense of depth and dimension—think ripples on water or the gentle undulation of petals.
Ripple and Radial Fills: Ripple fills radiate outward from the center, while radial fills create spoke-like effects. Both are excellent for mandala-style designs or sunburst motifs, drawing the eye to the center and adding a dynamic energy to your work.
Florentine Effects: Take it up a notch with Florentine stitching—flowing patterns that follow digitized lines within the circle, introducing sophisticated textural variations. This technique is ideal for adding complexity to medallions or abstract designs.
Professional Tips:
- Choose threads that complement or contrast with your appliqué for maximum impact.
- Manage stitch density to avoid bulk or distortion—test on scraps to find the sweet spot.
- Layer half or quarter circles for geometric complexity, or combine fills for a truly unique look.
Circular embroidery attachments, paired with these advanced techniques, unlock a universe of design possibilities. Whether you’re aiming for subtle texture or bold statement pieces, the only limit is your imagination.
Ready to put these techniques to work? Grab your attachment, prep your fabric, and start stitching circles that are anything but ordinary. The world of circular embroidery is waiting—why not make your mark?
4. Creative Applications in Quilting and Home Décor
Circular embroidery isn’t just a technical feat—it’s a creative playground for quilters using a quilting and embroidery machine. By harnessing the precision of circular attachments, you can transform ordinary fabrics into mesmerizing works of art, infuse everyday items with personality, and streamline classic techniques. Let’s dive into the most inspiring ways to apply circular embroidery in your projects.
4.1 Precision Circle Quilting and Yo-Yo Construction
Circular embroidery attachments have revolutionized geometric quilt design, making it possible to achieve perfect circles and intricate patterns with ease. For quilters, one standout application is the creation of drunkard’s path blocks—a classic pattern built from interlocking curves. By anchoring the center pin of your attachment at strategic points within each block, you can stitch flawless, symmetrical circles that complement patchwork layouts and add dynamic movement to your quilt. But the magic doesn’t stop at blocks. Ever tried making fabric yo-yos by hand? It’s a labor of love, but with a circular attachment, you can accelerate yo-yo production dramatically. The attachment quickly lays down gathering stitches for 2-inch yo-yos and other circular fabric manipulations, saving significant time and ensuring uniform results. Professional workshops and online tutorials highlight how these techniques can turn leftover quilt blocks or fabric scraps into table toppers, wall hangings, or playful embellishments. The creative potential is endless: combine different circle sizes, layer contrasting fabrics, or experiment with decorative stitches to make your quilt blocks pop. With a little practice, you’ll find that circular quilting isn’t just about accuracy—it’s about unlocking new dimensions of design.
4.2 Functional Textile Projects: Bags and Table Runners
Circular embroidery isn’t limited to quilts—it’s a powerful tool for crafting functional textiles like tote bags and table runners that are as sturdy as they are stylish. Imagine a tote bag with a perfectly stitched circular motif as its centerpiece, or a table runner adorned with concentric rings that catch the light and draw the eye.
Step-by-step, here’s how you might approach a circular tote bag project:
- Cut and Stabilize: Start with fabric panels at least 3 inches larger than your intended circle. Apply a suitable stabilizer—fusible or cut-away works well—to ensure your fabric remains firm and smooth throughout stitching.
- Mark the Center: Fold the fabric in quarters and finger-press to locate the precise center. This is where you’ll anchor your circular attachment.
- Stitch the Circle: Use your attachment to sew a decorative or utility stitch in a perfect circle. For added flair, try layering fabrics for appliqué or using contrasting threads.
- Construct the Bag: Once your circles are complete, assemble the tote with gusset construction for depth and finish with binding for a polished edge.
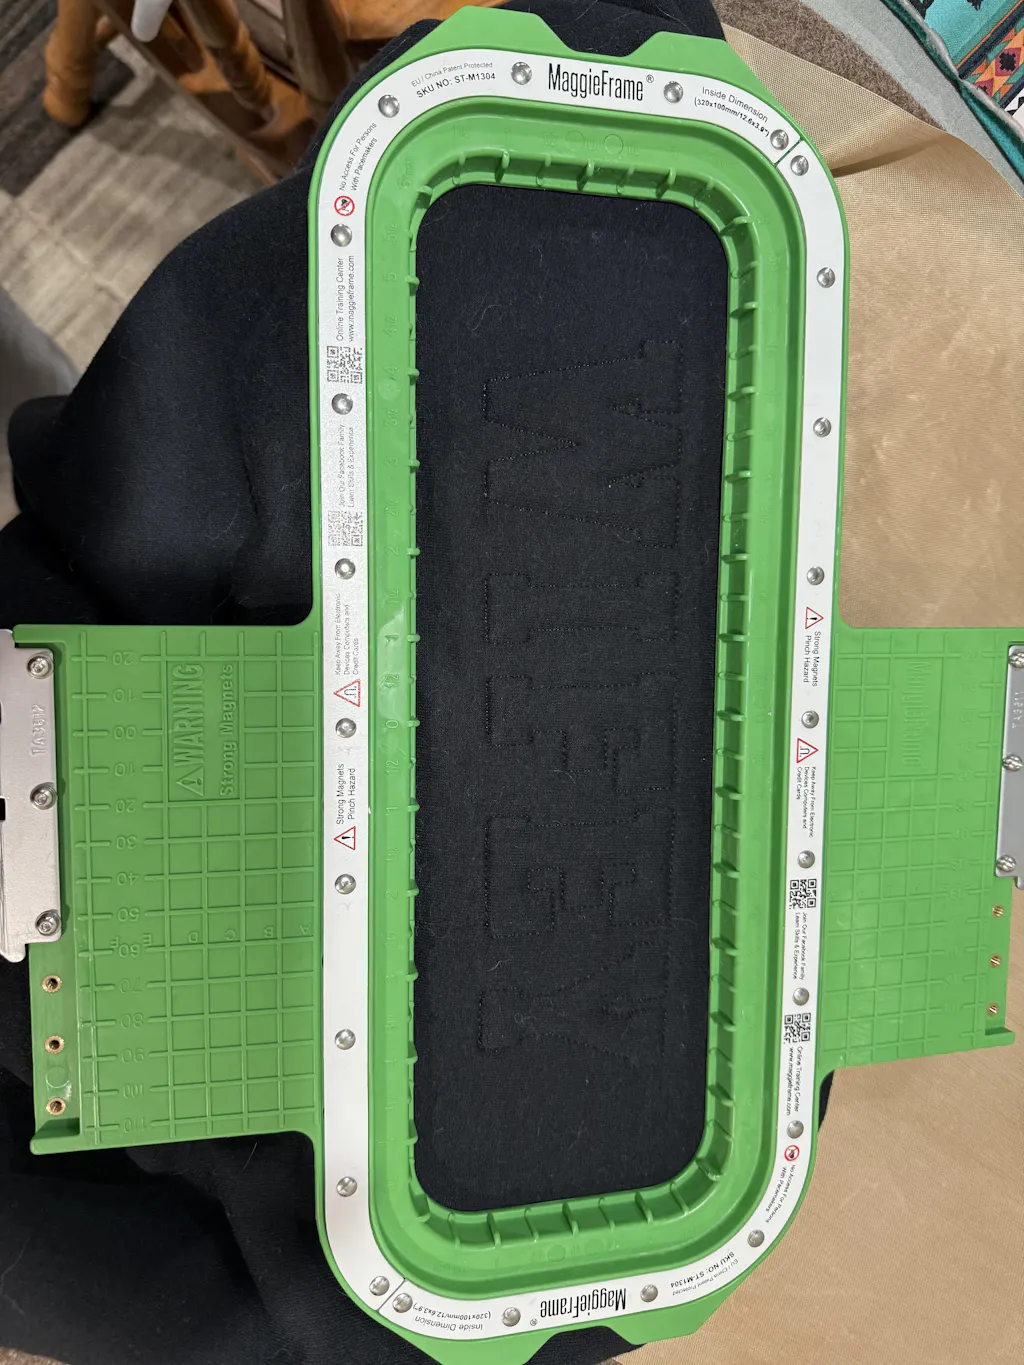
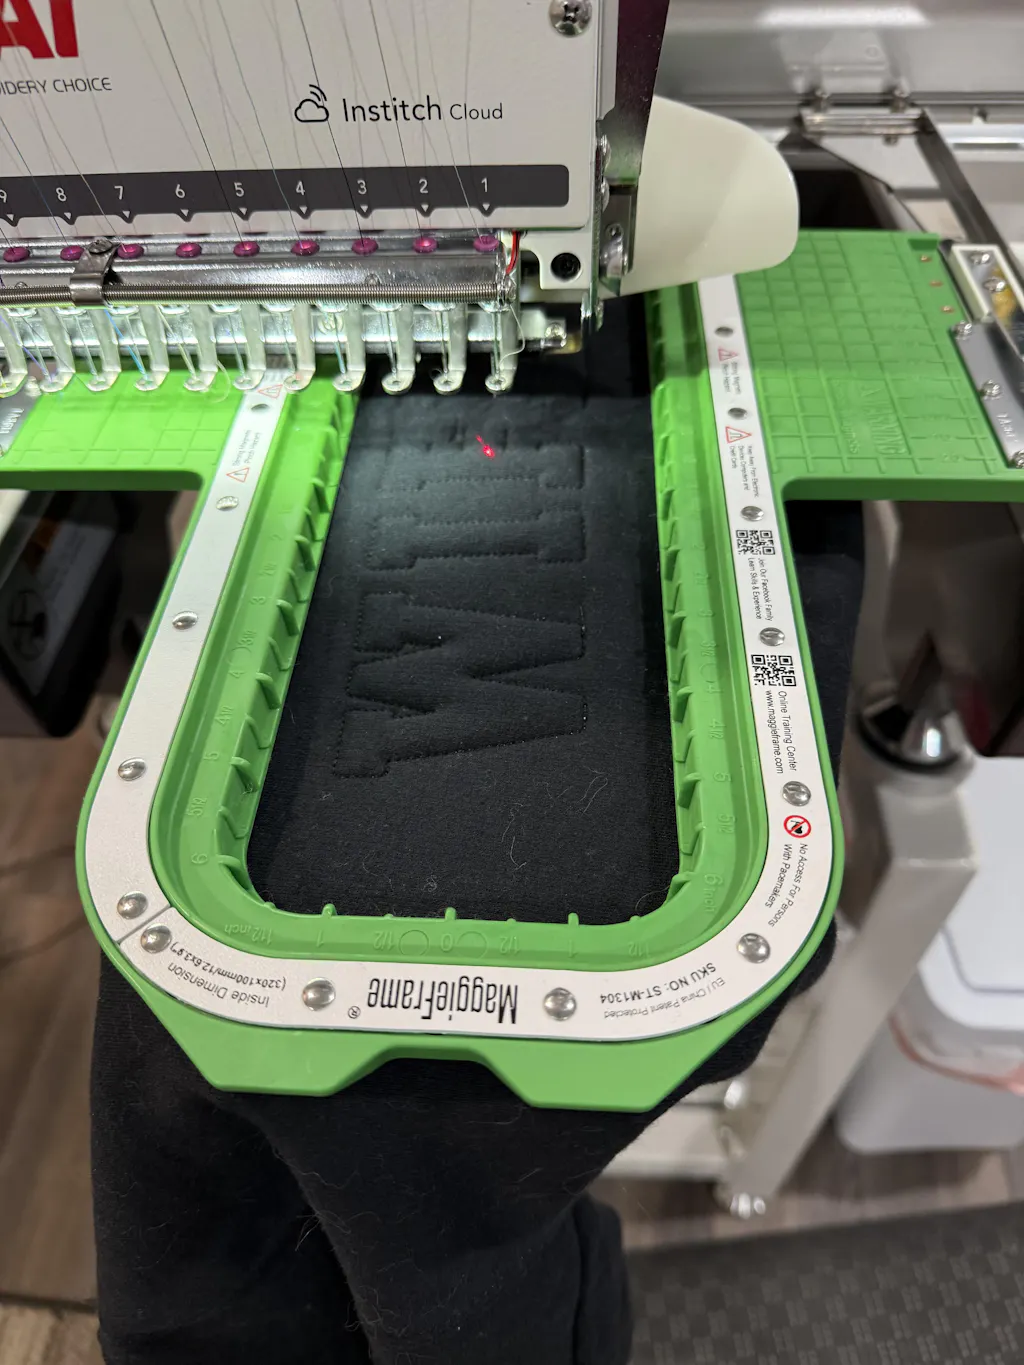
When working with knits or layered materials, maintaining even tension is crucial. Here, MaggieFrame’s garment embroidery hoops shine—they provide robust, even tension across the fabric, minimizing distortion and ensuring professional results. The magnetic system is especially helpful for stabilizing thicker or more delicate textiles, making it easier to achieve crisp, clean circles even on challenging materials.
Table runners benefit from the same approach: use your circular attachment to create repeating motifs or border flourishes, then finish with careful binding. The result? Functional pieces that double as conversation starters.
4.3 Surface Embellishment Techniques
Ready to take your embellishment game to the next level? Circular embroidery attachments open the door to a world of textured effects and intricate patterns.
Punch-work texturing—especially on sturdy fabrics like denim—becomes a breeze with the right setup. By combining the circular motion of your attachment with a punch tool, you can create raised, tactile designs that add dimension to everything from upholstery to decorative pillows.
Border flourishes and mandala patterns are also within reach. Using decorative braiding or cording feet, you can stitch elaborate circular motifs that frame a project or serve as stunning focal points. Professional instructors often recommend experimenting with different presser feet—like the open-toe or clear embroidery foot—to maximize visibility and control as you work.
Don’t be afraid to layer techniques: try combining appliqué, couching, and decorative stitches within a single circle for a truly one-of-a-kind effect. With each project, you’ll discover new ways to push the boundaries of what circular embroidery can achieve in home décor.
5. BERNINA #83 Attachment: Expert Tutorial Guide
The BERNINA #83 Circular Embroidery Attachment is the gold standard for the best embroidery machine setups. Whether you’re a seasoned pro or just starting your circular embroidery journey, mastering this tool will elevate your projects to new heights.
5.1 Installation and Machine Configuration
Getting started with the BERNINA #83 is refreshingly straightforward. Here’s how to set yourself up for success:
- Screw-Mounting: Secure the attachment directly to your machine’s free-arm using the provided screw-on mechanism. The attachment features two distinct mounting holes, offering flexibility in positioning. Place the extension arm to the right or left of the presser foot, depending on your project’s needs.
- Presser Foot Compatibility: The #83 works beautifully with a wide range of BERNINA presser feet. For decorative stitches, the #39C foot is a favorite—it features a channeled bottom for thicker stitching and clear registration lines for perfect alignment. The open-toe #20 foot is another popular choice, offering maximum visibility for intricate work.
- Radius Calibration: Adjust the sliding pin to set your desired circle diameter. For example, to create a 3-inch circle, measure 1.5 inches from the pin to the needle. The attachment accommodates circles from approximately 1 to 5.3 inches, making it suitable for everything from tiny embellishments to bold statement pieces.
Before you begin stitching, ensure your fabric is well stabilized and the center is accurately marked. This foundation is key to achieving flawless, professional results.
5.2 Operational Workflows and Troubleshooting
Once installed, the BERNINA #83 makes circular embroidery almost effortless:
- Circular Appliqué Construction: Layer your appliqué fabric with fusible interfacing, position it on the attachment’s pin, and stitch your circle. After stitching, trim close to the seam, create a slit in the interfacing, and turn the fabric right side out for a crisp, clean appliqué.
- Clockwise/Counterclockwise Stitching: The attachment’s design allows you to position it on either side of the needle, enabling both clockwise and counterclockwise stitching. This flexibility is especially useful for mirrored motifs or circular lettering.
- Troubleshooting Tips:
- Fabric Shifting: If your fabric slips during stitching, double-check your stabilization. Using a double or triple layer of stabilizer, or a temporary adhesive spray, can help.
- Irregular Shapes: Ensure the fabric is anchored securely at the center and remains flat as the machine rotates it. Avoid pulling or pushing—let the feed dogs and attachment do the work.
- Stitch Alignment: For decorative patterns, pause before the last repeat to adjust stitch length or density, ensuring a seamless join.
Comprehensive video tutorials and downloadable eBooks from BERNINA provide step-by-step guidance, from installation to advanced techniques. With a little practice, you’ll find the #83 attachment to be an indispensable ally for everything from quilting to home décor.
6. Stabilization and Material Science for Perfect Circles
Achieving flawless circles in embroidery is as much about science as it is about art. The interplay of stabilizers, threads, and needles determines whether your circles are crisp and smooth—or plagued by puckering and distortion. Let’s break down the evidence-based best practices for professional results.
6.1 Stabilizer Selection Matrix by Fabric Type
Choosing the right stabilizer is the cornerstone of successful circular embroidery. Here’s how to match your stabilizer to your fabric:
| Fabric Type | Recommended Stabilizer | Notes |
|---|---|---|
| Lightweight Cottons | Medium-weight cut-away or fusible | Provides permanent support and resists stretching during rotation. |
| Knits & Stretch Fabrics | PolyMesh or multi-layer cut-away | PolyMesh offers excellent tension control—especially when paired with MaggieFrame hoops. |
| Denim & Heavy Fabrics | Heavyweight tear-away + interfacing | Double up for extra firmness; ensures smooth rotation without distortion. |
| Delicate Silks | Wash-away or light fusible | Prevents residue and maintains fabric integrity. |
Multi-layer stabilization—combining interfacing, stabilizer, and batting—distributes stress and prevents localized distortion. For circular embroidery, especially on knits, MaggieFrame’s garment embroidery hoops excel by maintaining even tension across the fabric, minimizing the risk of puckering and irregular shapes. Similarly, the hoopmaster hooping station provides exceptional stability.
Floating methods (hooping only the stabilizer, then adhering the fabric with spray adhesive or basting) are particularly effective for circular designs. This technique allows the fabric to move naturally during rotation, reducing stress and distortion.
6.2 Thread and Needle Optimization Strategies
Thread and needle choices are just as critical as stabilization. Here’s how to optimize your setup:
-
Thread Selection:
- Use embroidery-specific threads for the upper thread, with matching bobbin thread for consistent tension and appearance.
- For hand embroidery circles, a single strand of floss offers superior blending and detail compared to multi-strand approaches.
-
Needle Recommendations:
- Fine needles—like Microtex size 70 or Embroidery size 75—are ideal for circular embroidery. Their sharp, thin points penetrate fabric cleanly, minimizing visible holes and supporting higher stitch density.
-
Tension Adjustment:
- Always test your setup on a scrap before starting your main project. Adjust thread tension as needed to prevent puckering and ensure smooth, even stitches.
-
Stitch Direction:
- Maintain consistent radial or circumferential stitch orientation to support fabric stability and prevent irregular shaping.
-
Sample Testing:
- Create a test sample to reveal any issues with your fabric-stabilizer-thread combination and fine-tune settings before committing to your final project.
Finally, don’t underestimate the value of an extension table. A large, flat workspace supports fabric movement during rotation, preventing binding or catching that can lead to distortion.
By mastering these stabilization and material science strategies, you’ll consistently achieve perfect circles—no puckering, no distortion, just smooth, professional results every time.
7. Attachment Comparison: Features and Value Analysis
When it comes to circular embroidery, the attachment you choose can make or break your creative journey. With several leading brands vying for your attention—each touting unique features and engineering philosophies—how do you pick the right tool for your needs? Let’s dive into a head-to-head comparison, examining the technical specs, compatibility, and value propositions of the top contenders.
7.1 Technical Specifications Across Leading Brands
Choosing a circular embroidery attachment isn’t just about brand loyalty—it’s about matching your ambitions to the right set of features. Here’s how the major players stack up:
| Feature | Husqvarna Viking | Brother | BERNINA #83 | PFAFF |
|---|---|---|---|---|
| Diameter Range | 6–26 cm (2.5–10.25") | 3–13 cm (1.2–5.1") | 2.5–13.5 cm (1–5.3") | Not specified |
| Machine Compatibility | Groups 8 & 9 (premium series) | 40+ models, entry to advanced | Most current & older models | Not specified |
| Included Accessories | Basic attachment only | Bundle: braiding & cording feet | Basic attachment with mounting tools | Not specified |
| Stitch Limitations | Width <7mm (9mm for Group 9) | Not specified | Compatible with decorative stitches | Not specified |
| Mounting Method | Standard attachment | Pivot pin system | Free arm screw mount | Not specified |
| Stabilization Requirements | Not specified | Not specified | 2–3 layers of stabilizer recommended | Not specified |
Husqvarna Viking stands out for its expansive diameter range, making it the go-to for large-scale quilting and bold decorative work. Its compatibility is focused on high-end machines, ensuring optimized performance but limiting universal access. Stitch width is capped for safety and machine longevity.
Brother offers a compelling bundle, including specialized feet for braiding and cording, and boasts the broadest compatibility—spanning over 40 models from basic to advanced. Its automated fabric pivoting system is a boon for beginners and those juggling multiple machines.
BERNINA #83 is all about precision. Its mid-range diameter capability is paired with robust construction and professional-grade engineering. The attachment’s flexibility—mounting on either side of the needle and supporting a wide array of presser feet—caters to both decorative and utility applications. BERNINA emphasizes stabilization, recommending double or triple layers of stabilizer for best results.
PFAFF is less documented in terms of technical specifics but is positioned as a creative tool for unique embellishments, likely following similar design principles.
Performance Takeaways:
- Size Matters: Husqvarna Viking leads for the largest circles, while BERNINA and Brother cover most standard needs.
- Accessory Bundles: Brother’s included feet offer immediate creative versatility.
- Stabilization: BERNINA’s focus on proper stabilization pays off in stitch quality, especially on challenging fabrics.
- Stitching Flexibility: All three major brands support decorative stitches, but check your machine’s stitch width limitations before diving in.
7.2 Cost-Benefit Evaluation for Different Users
Let’s talk value—because the best tool isn’t always the most expensive, and the right investment depends on your workflow.
Professional Studios: For high-throughput environments where reliability and consistency are non-negotiable, BERNINA #83 shines. These studios often source commercial embroidery machine for sale to handle heavy workloads.
Multi-Brand Machine Environments: If you’re juggling a fleet of machines or planning future upgrades, Brother’s attachment is a savvy choice. Its wide compatibility and bundled accessories mean you can switch between machines and techniques without missing a beat. The automated pivoting system also streamlines the learning curve for teams or classrooms.
Large-Scale Decorative Projects: Need to make a statement? Husqvarna Viking’s superior diameter range is unmatched for oversized motifs and quilt blocks. Its focus on high-end compatibility ensures smooth operation for ambitious designs.
Hobbyists and Beginners: If you’re just dipping your toes into circular embroidery, Brother’s user-friendly features and inclusive accessory pack offer the best bang for your buck. You’ll get professional-quality results without a steep learning curve or the need for extra purchases.
Durability vs. Price: While initial costs vary and detailed pricing wasn’t specified in the research, consider the total cost of ownership:
- BERNINA and Husqvarna Viking attachments may command a premium but deliver on durability and precision—ideal for those who value long-term reliability.
- Brother delivers immediate value through its accessory-rich bundle and broad compatibility, reducing the need for future add-ons.
Bottom Line: Your best choice depends on your existing equipment, project ambitions, and appetite for experimentation. Whether you’re running a professional studio or exploring as a hobbyist, there’s a circular embroidery attachment that fits your needs—and your budget.
8. Conclusion: Elevating Your Circular Embroidery Craft
Circular embroidery is more than a technique—it’s an invitation to explore, experiment, and elevate your craft. By mastering computer embroidery machine attachments, understanding material science, and leveraging unique features, you unlock creative possibilities. Whether you’re quilting bold motifs, embellishing home décor, or personalizing garments, the right circular embroidery attachment transforms your vision into reality.
Remember: the journey to perfect circles is paved with careful preparation, thoughtful material choices, and a willingness to try new methods. Don’t be afraid to experiment with different stitches, stabilizers, and design ideas. Each project is an opportunity to refine your skills and discover fresh inspiration.
Now, it’s your turn—grab your favorite attachment, prep your fabric, and start stitching circles that are anything but ordinary. The world of circular embroidery awaits!
9. FAQ: Solving Common Circular Embroidery Challenges
9.1 Q: How can I prevent puckering when stitching circles?
A: Puckering is often caused by insufficient stabilization or incorrect tension. Use 2–3 layers of stabilizer under your fabric, especially for delicate or stretchy materials. Test your thread tension on a scrap before starting your main project, and make sure your fabric is flat and taut during stitching.
9.2 Q: What’s the best way to stabilize thick or layered fabrics for circular embroidery?
A: For thick or multi-layered fabrics, combine a heavyweight tear-away stabilizer with interfacing. Floating methods—hooping only the stabilizer and adhering the fabric with spray adhesive or basting—allow the fabric to move naturally during rotation, reducing stress and distortion.
9.3 Q: My circles come out irregular or misshapen. What am I doing wrong?
A: Irregular circles usually result from poor fabric anchoring or inconsistent tension. Double-check that your fabric is securely positioned at the attachment’s center pin and remains flat as it rotates. Avoid pulling or pushing the fabric—let the feed dogs and attachment do the work.
9.4 Q: How do I adapt decorative stitches for small circles?
A: When working with small circles, choose stitches with shorter lengths and widths to maintain smooth curves. Pause before the last repeat to adjust stitch density or length, ensuring a seamless join. Testing on scraps helps fine-tune your settings for perfect results.
9.5 Q: What needles and threads should I use for circular embroidery?
A: Fine needles, such as Microtex size 70 or Embroidery size 75, are ideal for clean, crisp stitches. Use embroidery-specific threads for the upper thread and matching bobbin thread for consistent tension. Always test your setup before starting your main project.
Ready to conquer your next circular embroidery challenge? With the right tools, techniques, and a bit of patience, you’ll be stitching flawless circles in no time!