1. Introduction: The Rich Tapestry of Embroidery Stitches
Embroidery is more than just needle and thread—it's a living, breathing art form that bridges continents, centuries, and cultures. From the delicate whitework of Ireland to the bold, geometric patterns of Japanese Sashiko, embroidery stitches are the vocabulary of a universal language. Each stitch, whether simple or complex, carries a story: of heritage, innovation, and the creative hands that bring fabric to life. In this guide, we’ll journey through the essential stitch families, explore the logic behind their classification, and discover how knowing their names can unlock a world of inspiration. Ready to thread your needle and expand your creative horizons? Let’s dive into the intricate world of embroidery stitches, where tradition meets endless possibility.
Table of Contents
- 1. Introduction: The Rich Tapestry of Embroidery Stitches
- 2. Comprehensive Embroidery Stitch Directory by Family
- 3. Classification Systems for Embroidery Techniques
- 4. Multilingual Stitch Lexicon: Bridging Global Traditions
- 5. Practical Lettering Techniques: Stitch Selection Guide
- 6. Historical & Cultural Embroidery Spotlight
- 7. Essential Stitch Tutorials: From French Knots to Void Work
- 8. Conclusion: Preserving and Innovating Stitch Traditions
- 9. Embroidery Stitch FAQ
2. Comprehensive Embroidery Stitch Directory by Family
Embroidery stitches are as diverse as the cultures that cherish them. To make sense of this vibrant landscape, stitches are typically grouped into “families” based on their structure or function. This approach not only helps you identify stitches for your next project—it also reveals the logic behind their use and adaptation across styles. Let’s unravel the most foundational families and their standout members.
2.1 Foundation Stitch Families: Chain, Satin & Running Stitches
Chain Stitch Family The chain stitch family is all about linked loops that form a continuous, flexible line—think of it as the embroidery world’s answer to a bicycle chain. This family includes:
- Chain Stitch (and its variants: regular, reversed, magic chain)
- Lazy Daisy (detached chain, perfect for petals and leaves)
- Palestrina Stitch (a knotted chain for added texture)
- Rope Stitch, Braid Stitch, Rosette Stitch
Chain stitches are celebrated for their versatility, appearing in everything from Indian Kantha to Scandinavian folk art. Their looped structure makes them ideal for outlining, filling, and decorative borders.
Satin Stitch Family If you crave smooth, glossy surfaces, the satin stitch family is your go-to. These stitches lay threads side by side, creating a lustrous “satin” effect:
- Satin Stitch (the classic fill)
- Padded Satin Stitch (for extra dimension)
- Long and Short Stitch (essential for needle painting and shading)
- Eyelet Stitch, Seed Stitch, Trailing Stitch
Satin stitches excel at filling shapes—think monograms, flower petals, or bold motifs. Their even, parallel lines create a polished look that’s both modern and timeless.
Running Stitch Family The running stitch is the minimalist’s dream: a simple, dashed line that forms the backbone of countless techniques worldwide.
- Running Stitch
- Basting Stitch
- Algerian Eye Stitch
- Fern Stitch
- Holbein Stitch (double running, used in blackwork)
- Bosnian Stitch
Despite its simplicity, the running stitch is the foundation for patterns like Japanese Sashiko and Indian Kantha, proving that sometimes less really is more.
Key Takeaway: Understanding these core families helps you not only identify stitches but also adapt them creatively—whether outlining a design, filling a shape, or adding texture.
2.2 Structural & Decorative Families: Backstitch, Blanket & Knots
Backstitch Family Backstitch is the workhorse of embroidery, prized for its strength and clarity. Its variations include:
- Backstitch (for crisp outlines and lettering)
- Interlaced Backstitch, Whipped Backstitch, Split Backstitch
- Pekinese Stitch, Open Backstitch, Herringbone Ladder
Use backstitch when you need definition—think borders, text, or intricate details.
Blanket Stitch Family Originally designed to secure the edges of blankets, this family is now a decorative powerhouse:
- Blanket Stitch, Buttonhole Stitch
- Slanted, Closed, Crossed Blanket Stitch
- Buttonhole Wheel, Rosette of Thorns, Raised Blanket Stitch
Blanket stitches are perfect for edging appliqué, finishing raw fabric edges, or adding playful borders.
Knot Stitches Want to add dimension? Enter the world of knots:
- French Knot (tiny, textured dots)
- Bullion Knot (long, coiled stitches for roses and accents)
- Colonial Knot, Coral Stitch, Oyster Stitch
Knots bring embroidery to life, offering tactile interest and a pop of texture.
Functionality Meets Flair: The structure of each stitch family determines its best use—backstitch for outlines, blanket stitch for edges, knots for embellishments. By understanding these relationships, you can select the right stitch for each design element, ensuring both beauty and durability.
2.3 Specialty Stitch Collections: Feather, Herringbone & Woven
Feather Stitch Family Light and airy, feather stitches mimic the look of—what else?—feathers. This family includes:
- Feather Stitch, Close Feather Stitch, Maidenhair Stitch
- Double Feather, Crossed Feather, Plaited Feather
Feather stitches are commonly used for vines, seaweed, or anything that calls for a flowing, organic line.
Herringbone Stitch Family Named for its resemblance to the bones of a herring, this family is all about crisscrossed, reversible lines:
- Herringbone Stitch, Vertical Herringbone, Vandyke Stitch
- Herringbone Ladder, Laced Herringbone, Indian Herringbone
- Otomi Stitch (notable in Mexican embroidery)
Herringbone stitches are beloved for their flexibility—they can be delicate or bold, flat or raised, and are often used in border work or as a foundation for lacing.
Woven & Interlaced Stitches For those who crave complexity, woven stitches offer a playground of interlaced threads:
- Woven Wheel (Spider Web Rose)
- Jessica Stitch, Waffle Stitch, Weaving Stitch
- Woven Trellis, Woven Bar
These stitches create dramatic, three-dimensional effects and are popular in regional styles like Cretan (Mediterranean) and Otomi (Mexican) embroidery.
Regional Flair: Many specialty stitches carry local names and unique twists. For example, the Otomi stitch is a hallmark of Mexican embroidery, while Cretan stitch is a Mediterranean favorite. Exploring these variations connects you to a global community of makers and traditions.
3. Classification Systems for Embroidery Techniques
Embroidery isn’t just about individual stitches—it’s about how those stitches interact with fabric, tradition, and creative intent. Classification systems help us understand these relationships, making it easier to choose the right technique for every project.
3.1 Technical Groupings: Counted-Thread vs Freestyle Methods
Counted-Thread Embroidery
In counted-thread techniques, precision is key. Stitches are placed over a set number of fabric threads, often on even-weave materials like linen or Aida cloth. The result? Crisp, geometric patterns with a rhythmic, meditative quality.
- Key Features:
- Fabric: Even-weave (linen, cotton, Aida)
- Stitches: Cross-stitch, blackwork, Bargello, Hardanger
- Fabric Visibility: Often visible between stitches
- Examples:
- Cross-stitch: Iconic X-shaped stitches, beloved for samplers and pictorial designs
- Blackwork: Monochrome, reversible geometric patterns
- Bargello: Vertical stitches forming wave-like designs, rooted in Renaissance Italy
Freestyle (Surface) Embroidery
Here, the rules loosen. Stitches are applied without regard to the fabric’s weave, allowing for painterly effects and creative freedom.
- Key Features:
- Fabric: Any type (silk, cotton, blends)
- Stitches: Satin, stem, crewel, needle painting
- Fabric Visibility: Usually covered
- Examples:
- Crewel Embroidery: Wool threads, often floral or Jacobean motifs
- Art Needlework: Modern, experimental blends of old and new
Choosing Your Method:
Counted-thread is ideal for precise, repetitive designs; freestyle lets you “paint” with thread, perfect for expressive or naturalistic motifs. Your fabric choice and desired effect will guide you.
3.2 Cultural Traditions: Whitework, Canvas & Regional Styles
Whitework Embroidery
White-on-white elegance—whitework is defined by its subtlety and skill. Techniques include:
- Drawn Thread Work: Threads are removed and the remaining fabric is embellished.
- Cutwork: Portions of fabric are cut away, edges secured with stitches.
- Examples:
- Hardanger (Norway): Geometric, openwork designs
- Mountmellick (Ireland): Textured, raised stitches without open spaces
Canvas Work (Needlepoint)
Stitched on mesh canvas, canvas work covers the surface completely, often with wool threads.
- Key Features:
- Fabric: Mesh canvas
- Stitches: Tent, Florentine, Bargello
- Use: Upholstery, decorative panels
Regional Styles
Around the globe, embroidery adapts to local materials and aesthetics:
- Kantha (India): Running stitch quilting, often on recycled fabrics
- Sashiko (Japan): Decorative running stitches, traditionally white on indigo
- Chikankari (India): Whitework with a mix of flat, raised, and pulled thread stitches
- Otomi (Mexico): Bold, colorful motifs with unique stitch variations
Why Classification Matters:
Understanding technique categories helps you decode patterns, choose appropriate materials, and appreciate the cultural context behind each style. Whether you’re drawn to the precision of counted-thread or the expressive freedom of freestyle, there’s a world of possibility at your fingertips.
Ready to explore the next layers of embroidery’s global vocabulary? Stay tuned as we bridge traditions and languages in the next section—your creative passport awaits!
4. Multilingual Stitch Lexicon: Bridging Global Traditions
In the world of embroidery, a single stitch can go by a dozen names—each echoing the language, history, and culture of its practitioners. For embroiderers navigating international patterns or learning from global resources, understanding this multilingual maze is both a challenge and a creative passport. Let’s explore the tools and hurdles of decoding stitch names across languages and regions.
4.1 Stitch Dictionaries and Translation Resources
Imagine you’re following a French embroidery pattern, and you spot “Point de nœud”—but your only reference is in English. How do you know this is the beloved French Knot? That’s where multilingual stitch dictionaries become invaluable.
Key Resources for Stitch Identification:-
Sarah’s Hand Embroidery Stitch Picture Dictionary
This online resource is a treasure trove, cataloging over 300 stitches. Each stitch is grouped by family (think Back Stitch, Chain Stitch, Cretan Stitch), and—here’s the magic—offers alternate names in multiple languages. Hover over a stitch image, and you’ll see translations such as:
-
Chain Stitch:
- English: Chain Stitch
- Spanish: Punto de cadeneta
- French: Point de chaînette
- German: Kettenstich
- Italian: Punto catenella
- Portuguese: Ponto cadeia
- Swedish: Kedjestygn
-
French Knot:
- English: French Knot
- Spanish: Punto de nudo francés
- French: Point de nœud
- German: Knötchenstich
- Italian: Punto nodini
- Portuguese: Ponto de nó francês
- Swedish: Franska knutar
This visual-first approach means even if you don’t know the name, you can match the image to your pattern and find its equivalent.
-
Chain Stitch:
-
Embroidery Stitches by Name (Needle ‘n Thread)
An alphabetical index that cross-references alternate names sourced from classic and modern stitch dictionaries. For example, the Bullion Knot is also known as “slug stitch” or “worm stitch” in some traditions.
-
Glossaries from Guilds and Associations
Organizations like the Embroiderers’ Guild of America provide glossaries that, while not always multilingual, highlight regional and historical variations (e.g., Battenberg lace, Ayrshire work).
- Identify the Stitch Visually: Use picture dictionaries to match unfamiliar stitches in your pattern.
- Check for Alternate Names: Hover or cross-reference to see what the stitch is called in other languages.
- Leverage Community Forums: Stitchers worldwide often share translation tips for tricky terminology.
As embroidery becomes more global—think Japanese Sashiko patterns in Paris or Mexican Otomi motifs in Berlin—these resources empower you to translate not just words, but entire creative traditions.
4.2 Regional Naming Variations and Standardization Challenges
If you’ve ever wondered why a single stitch seems to have a dozen names, you’re not alone. The world of embroidery is a patchwork of evolving terms, shaped by centuries of migration, trade, and cultural exchange.
Historical Influences and Fragmentation:-
Multiple Names, One Stitch:
Take Bargello, for example. This bold, geometric stitch is also known as “flame stitch,” “Florentine work,” “Hungarian point,” and “Irish stitch,” depending on where you ask. The origins are uncertain, but the style flourished in Florence during the Italian Renaissance and was later adapted across Europe.
-
Descriptive vs. Technical Naming:
Some names describe what the stitch looks like (e.g., “French Knot”), while others reference the technique or region (e.g., “Punto de nudo francés” in Spanish).
-
Regional Adaptations:
Even within a single country, stitches can have different names. For instance, the “couching stitch” in Bethlehem may differ in name and execution from other Palestinian regions, influenced by local customs and materials.
| Factor | Impact | Example |
|---|---|---|
| Regional Variations | Same stitch, different names in adjacent areas | Couching stitch in various Palestinian regions |
| Historical Influences | Terms evolve with cultural exchange | Gold couching in Bethlehem wedding attire |
| Technical vs. Descriptive | Some names describe appearance, others technique | Cross-stitch vs. punto de cruz (Spanish) |
-
Visual Databases:
Tools like Sarah’s dictionary reduce reliance on language, letting images do the talking.
-
Cultural Integration Projects:
Initiatives like Turtlestitch blend embroidery tradition with digital tools, promoting cross-cultural understanding.
While a universal, cross-referenced stitch database remains elusive, today’s embroiderers have more tools than ever to bridge linguistic and cultural divides. Embrace the diversity—each name adds a new thread to embroidery’s global story.
5. Practical Lettering Techniques: Stitch Selection Guide
Lettering in embroidery is where art meets clarity—every curve, corner, and flourish must be both beautiful and legible. The secret? Choosing the right stitch for your font style and using the best tools for crisp, professional results. Let’s break down the essentials.
5.1 Optimal Stitches for Different Font Styles
When it comes to embroidering text, not all stitches are created equal. The right choice depends on your font—block, script, serif—and the effect you want to achieve.
Stitch Selection Cheat Sheet:
| Stitch | Characteristics | Best For | Font Compatibility |
|---|---|---|---|
| Back Stitch | Solid, continuous, precise | Outlines, sharp edges, details | Sans-serif, block letters |
| Stem Stitch | Smooth, rope-like, slightly raised | Script, flowing curves | Cursive, handwritten |
| Chain Stitch | Textured, bold | Thick outlines, filled letters | Block, bold fonts |
| Split Stitch | Braided, subtle dimension | Decorative accents, serifs | Serif, intricate designs |
| Outline Stitch | Smooth, less twist than stem stitch | Gentle curves, soft outlines | Rounded, hybrid fonts |
Font Style Recommendations:
- Script/Cursive Fonts:
- Best: Stem stitch for fluid, rope-like lines.
- Also great: Split stitch for a braided, decorative touch.
- Avoid: Back stitch (can look too rigid), chain stitch (may be too bulky).
- Printed/Block Fonts:
- Best: Back stitch for crisp, clean outlines.
- Also great: Chain stitch for bold, textured fills.
- Avoid: Stem stitch (may blur sharp edges).
- Serif Fonts:
- Best: Back stitch for defining serifs, stem stitch for smoothing curves.
Technique Tips for Legibility:
- Stitch Length: Use short stitches (1/8"–1/4") on tight curves for smoothness; longer stitches for straight lines.
- Thread Thickness: 1–2 strands for thin letters, 3–6 for chunky styles.
- Corners: Anchor transitions with a back stitch, and rotate your hoop to keep stitch direction consistent.
Visual Examples:
- Back stitch shines in blocky, all-caps monograms.
- Stem stitch brings cursive signatures to life.
- Satin stitch fills bold letters with a glossy, modern finish.
- Split stitch adds subtle texture to classic serif fonts.
Beginner-Friendly Approach:
Start with back stitch for clean lines, then experiment with stem stitch for curves. Combine both for depth—back stitch for outlines, stem stitch for inner details.
Curious how your favorite font looks in thread? Try out a few stitches on scrap fabric—the difference can be dramatic!
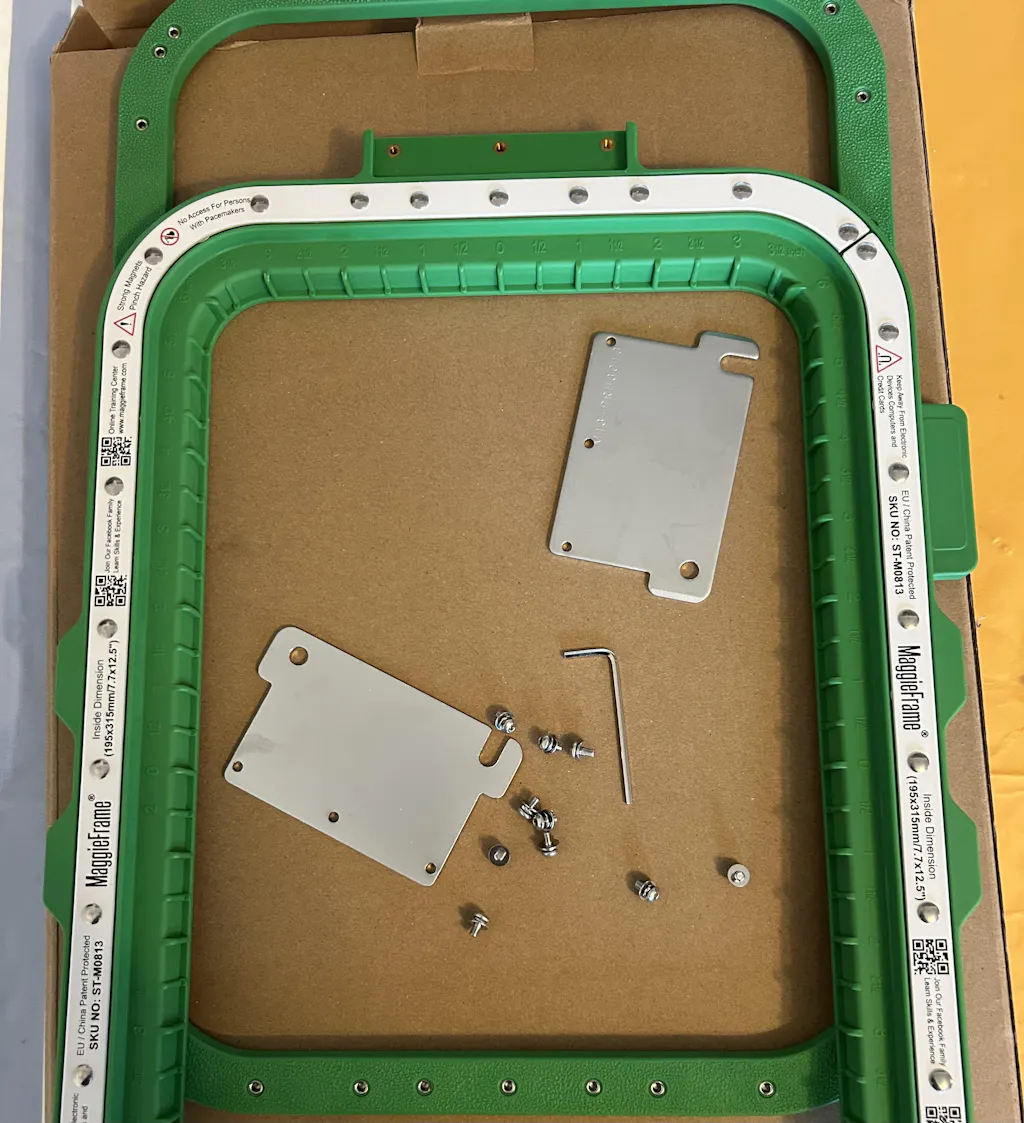
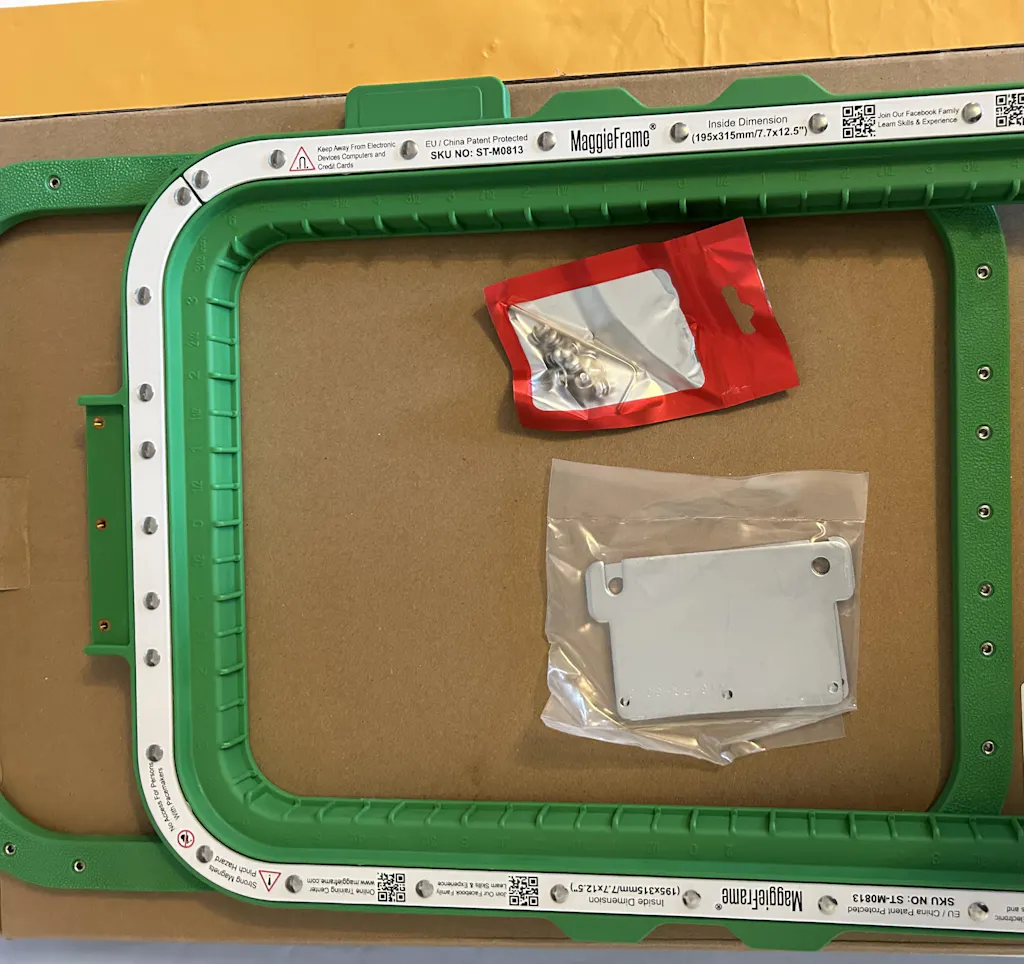
5.2 Advanced Technique: Professional Results with Magnetic Hoops
Ever spent more time re-hooping fabric than actually stitching? For crisp, flawless lettering—especially on garments—fabric stability is everything. Enter the magnetic embroidery hoop revolution, led by brands like MaggieFrame.
Why Magnetic Hoops Matter for Lettering:
-
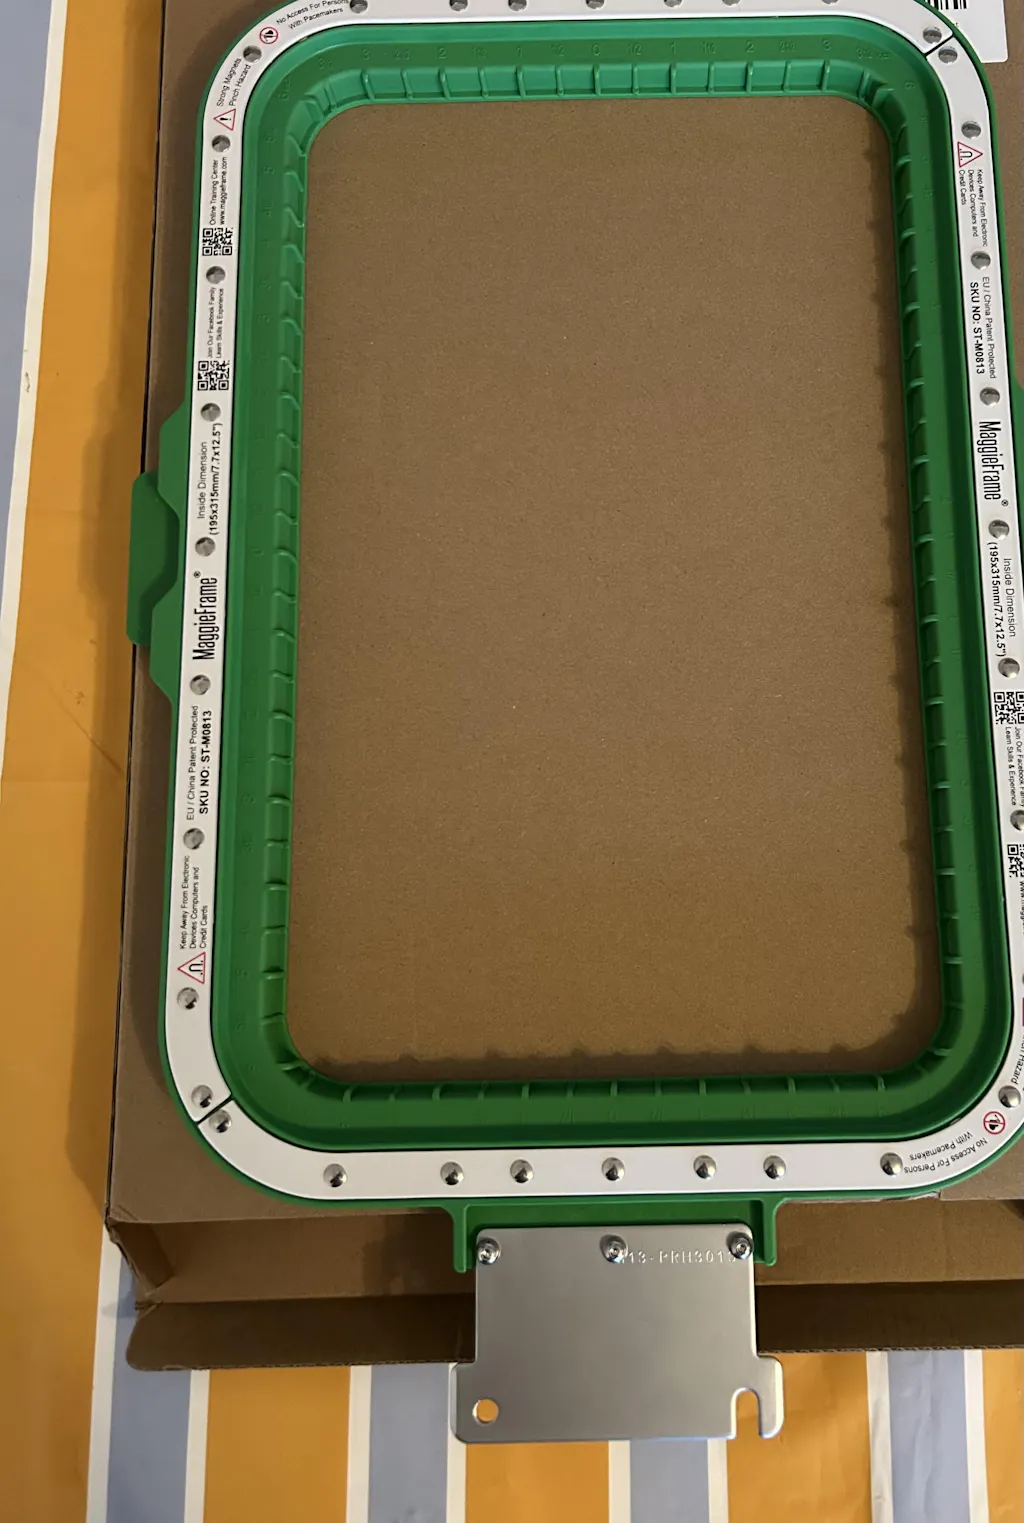
Rock-Solid Fabric Stability:
MaggieFrame’s powerful magnetic system grips fabric evenly, preventing slippage and distortion—so every letter stays sharp, even on stretchy or slippery materials. -
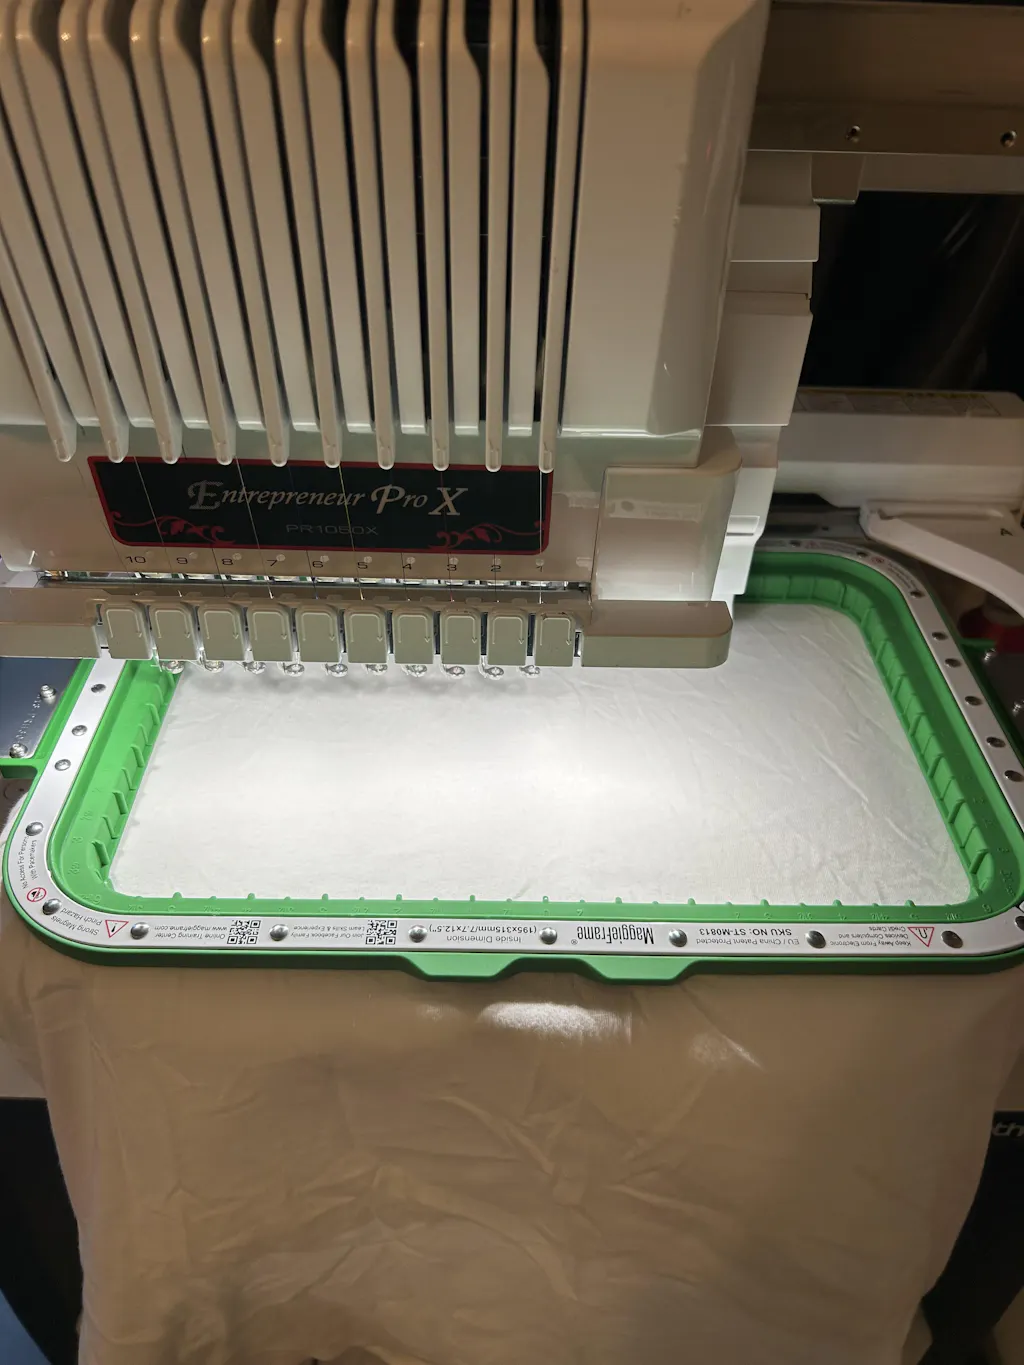
Lightning-Fast Hooping:
Compared to traditional screw-based hoops, MaggieFrame slashes hooping time by up to 90%. That means more time stitching, less time fiddling. -
Consistent Tension, Every Time:
The even pressure of magnetic hoops keeps your fabric taut from start to finish, eliminating puckering and ensuring your text looks as crisp as your design. -
No Hoop Burn:
Magnetic force distributes pressure gently, reducing those dreaded hoop marks that can mar finished pieces. -
User-Friendly for All Skill Levels:
Whether you’re a seasoned pro or a lettering newbie, MaggieFrame’s intuitive design makes setup a breeze—just snap in your fabric and go.
Real-World Impact:
- Embroiderers report cleaner, more professional-looking text—no more wobbly lines or uneven spacing.
- For high-volume shops, the time savings add up fast, boosting productivity and reducing operator fatigue.
Ready to step up your lettering game?
MaggieFrame magnetic hoops are a game-changer for anyone serious about embroidery text—offering speed, precision, and peace of mind with every project.
6. Historical & Cultural Embroidery Spotlight
Embroidery isn’t just a craft—it’s a living record of cultural identity, luxury, and resilience. Let’s journey through two iconic traditions: the opulent goldwork of India’s Zardozi and the textured whitework legacy of Ireland’s Mountmellick.
6.1 Zardozi: Indian Royal Goldwork Embroidery
Origins and Etymology: Zardozi comes from the Persian words zar (gold) and dozi (embroidery), a fitting name for a style that dazzles with metallic threads. Introduced to India during the Mughal Empire, Zardozi flourished under Emperor Akbar, becoming synonymous with royal attire and ceremonial grandeur.
Historical Significance:
- Royal Patronage: Once reserved for emperors and nobles, Zardozi adorned everything from court garments to wedding regalia. Motifs ranged from intricate florals to majestic peacocks and elephants.
- Materials and Techniques: Artisans used gold and silver wires, pearls, beads, and sequins, painstakingly coiling and stitching them onto silk, velvet, or satin. Some pieces took weeks to complete—a true labor of luxury.
- Colonial Era: Zardozi maintained its status during British rule, gracing military uniforms and ceremonial wear.
Modern Adaptations: While traditional Zardozi remains a niche art, contemporary designers now use metallic threads for faster, more accessible production. It continues to shine in bridal wear, home décor, and high fashion, marrying royal heritage with modern flair.
6.2 Mountmellick: Ireland's Whitework Legacy
Origins and Cultural Roots: Mountmellick embroidery was born in 1825 in County Laois, Ireland, thanks to Johanna Carter and the local Quaker community. As Ireland’s only indigenous white-on-white embroidery, it was taught in Quaker schools to empower women economically.
Design and Symbolism:
- Motifs: Inspired by Ireland’s landscape, you’ll find blackberries, oak leaves, ferns, and shamrocks—each stitch a tribute to nature.
- Materials: White cotton thread on white fabric, focusing on texture and raised effects rather than color.
Historical Decline and Revival:
- 19th-Century Boom: By 1890, Mountmellick supported dozens of women, with pieces like the 1847 quilt selling to nobility.
- Decline: Machine embroidery and global upheaval led to a downturn by the early 1900s.
- Revival: In the 1970s, Sister Teresa Margaret McCarthy sparked a renaissance, sourcing old patterns and teaching new generations.
Modern Preservation: Today, Mountmellick is celebrated worldwide, with museums housing historic pieces and artisans keeping the tradition alive.
Contrast with Other Whitework: Unlike Ayrshire or Broderie Anglaise, Mountmellick is defined by its three-dimensional texture, not cutwork or open spaces—a tactile testament to Irish ingenuity.
Embroidery is a living archive—each stitch, a thread connecting past and present, East and West, opulence and simplicity. Which tradition will inspire your next project?
7. Essential Stitch Tutorials: From French Knots to Void Work
Embroidery is a universe built one stitch at a time, and mastering the essentials—like French knots, bullion stitches, satin stitch, and void work—opens the door to infinite creative possibilities. Whether you’re looking to add dimension, achieve glassy-smooth fills, or explore the magic of negative space, the following tutorials break down each technique step by step, with troubleshooting tips to help you stitch with confidence.
7.1 Mastering Dimension: French Knots & Bullion Stitches
Few stitches pack as much punch into a tiny space as the French knot and bullion stitch. These dimensional wonders transform flat fabric into a tactile landscape—think flower centers, textured animal fur, or a sprinkle of starry dots. Let’s unravel their secrets:
French Knots: Step-by-Step Guide
- Secure Your Thread: Begin by anchoring your thread on the fabric’s backside using an away knot or a simple finger-tie.
- Bring the Needle Up: Pull the needle through to the front at your desired stitch point.
- Wrap the Thread: Hold the thread taut with your non-dominant hand and wrap it around the needle shank 2–3 times. (More wraps = larger knots.)
- Form the Knot: Insert the needle back into the fabric right next to (not into) the original entry point. Gently pull the thread to tighten the knot, guiding it into place.
- Repeat: For clustered effects, repeat steps 2–4, spacing the knots as closely as needed for your design.
Troubleshooting Tips:
- Loose Knots? Maintain gentle tension as you pull the thread through—too loose, and the knot unravels; too tight, and it puckers the fabric.
- Thread Snagging? Use shorter thread lengths and avoid over-wrapping the needle.
- Size Control: Adjust the number of wraps for smaller or larger knots.
Applications: French knots are perfect for adding eyes to embroidered animals, the center of flowers, or a textured fill for clouds and berries.
Bullion Stitches: Step-by-Step Guide
- Start as for a French Knot: Bring the needle up through the fabric.
- Wrap the Needle: Instead of just a couple of wraps, wind the thread around the needle several times (often 8–20 for a long coil). 极
- Pull Through: Insert the needle back into the fabric just beside the entry point, then gently pull the needle and thread through all the wraps, guiding the coil into place.
- Finish: Hold the wraps steady as you pull, then anchor the end on the fabric’s back.
Troubleshooting Tips:
- Stuck Needle? Use a milliner’s needle (same thickness along the shaft and eye) for easier passage through the wraps.
- Uneven Coils? Practice even tension and consistent wrap numbers.
Applications: Bullion stitches create elegant rose petals, caterpillars, or textured borders—think of them as embroidery’s answer to sculpting in miniature.
Quick Comparison Table
| Technique | Best For | Complexity | Time Investment |
|---|---|---|---|
| French Knots | Eyes, berries, texture | Low | Moderate |
| Bullion Stitches | Roses, accents, borders | Moderate | High |
Embrace the tactile joy of these stitches—once you master them, you’ll find yourself adding “just one more” to every project!
7.2 Achieving Perfect Flat Stitches: Satin & Void Techniques
There’s nothing quite like the sleek shine of a well-executed satin stitch or the bold drama of void work. Both require precision, patience, and a few pro tricks to get that flawless finish.
Satin Stitch: Step-by-Step Guide
- Outline the Area: Use a stem stitch or backstitch to define the shape you want to fill. This acts as a boundary and keeps your satin stitches neat.
- Fill Smoothly: Bring the needle up at one edge of the shape, then insert it at the opposite edge, laying the thread flat and parallel. Continue working side by side, keeping stitches close and even.
- Blend Colors (Optional): For gradient effects, alternate thread shades in adjacent rows.
Directional Tips for Perfection:
- Alternate Directions: Stitch in alternating directions (top-to-bottom, then bottom-to-top) to balance tension and prevent fabric distortion.
- Shorter Stitches for Curves: On tight curves, use shorter stitches to maintain smooth edges.
Troubleshooting:极>
- Fabric Puckering? Maintain even tension and avoid pulling stitches too tight.
- Uneven Surface? Use a hoop to keep fabric taut and stitches flat.
Void Work (Assisi Technique): Step-by-Step Guide
- Outline the Design: Use double running stitch (Holbein stitch) or stem stitch to trace the motif’s edges.
-
Fill the Background:
- For texture, scatter seed stitches (tiny, random straight stitches) in the background.
- For a uniform look, fill with parallel satin stitches.
- Create Contrast: Use contrasting thread colors or densities to make the “voided” motif pop.
Key Tips:
- Fabric Choice: Evenweave linen (28–36 count) or Aida 14 are ideal for consistent results.
- Design Selection: Bold, clean-lined motifs—like monograms or animal silhouettes—work best.
Technique Variations Table
| Technique | Description | Example |
|---|---|---|
| Assisi Work | Outline with dark thread, fill background with color | Medieval-style rabbits |
| Broderie Anglaise | Combine satin stitches with cutwork for lace effect | Eyelet embroidery |
Preventing Fabric Distortion:
When working large satin stitch areas, fabric can easily warp or pucker. Using a high-quality magnetic embroidery hoop in the right embroidery hoop sizes—like MaggieFrame—ensures even tension and keeps your fabric drum-tight throughout the process. The strong, uniform grip of MaggieFrame’s magnetic system helps you achieve crisp, professional-looking flat stitches every time, especially on challenging fabrics or large fills.
Why It Matters:
Flat, even stitches are the hallmark of polished embroidery. With the right technique and reliable hooping, you’ll turn every motif—be it a glossy monogram or a dramatic voided silhouette—into a showstopper.
8. Conclusion: Preserving and Innovating Stitch Traditions
Embroidery is a living bridge between past and present—a tapestry woven from centuries of tradition and bursts of modern creativity. As we’ve explored, understanding stitch families, mastering technique, and appreciating cultural context not only deepens your skills but connects you to a global community of makers. Whether you’re reviving historical styles, adapting stitches for today’s projects, or experimenting with new tools like magnetic hoops, each thread you lay is part of embroidery’s evolving story. So keep learning, keep stitching, and let your work honor both heritage and innovation. The next masterpiece is just a needle away.
9. Embroidery Stitch FAQ
9.1 Q: What are the most common beginner stitches, and which projects are they best for?
A: The top five fundamental stitches for beginners are backstitch, running stitch, satin stitch, French knot, and lazy daisy.
- Backstitch: Great for outlines, text, and detailed shapes—ideal for monograms or borders.
- Running Stitch: Perfect for simple lines, quilting, and Japanese Sashiko patterns.
- Satin Stitch: Best for filling shapes like petals, berries, or letters with a smooth, glossy look.
- French Knot: Adds texture—think flower centers, animal eyes, or decorative dots.
- Lazy Daisy: Ideal for creating leaves and flower petals.
Start with small motifs or samplers to practice these stitches, then apply them to personalized gifts, home décor, or wearable art.
9.2 Q: How can I find stitch equivalents across languages when pattern instructions are unfamiliar?
A: Visual identification is your best ally! Use online stitch picture dictionaries—like Sarah’s Hand Embroidery Dictionary—which group stitches by family and provide images alongside names in multiple languages. If you encounter an unfamiliar term, match the pattern’s diagram or photo to these resources. Community forums and embroidery guild glossaries can also help you cross-reference alternate names. When in doubt, look for characteristic features (loops, knots, lines) and compare them visually—embroidery is a universal language, after all.
9.3 Q: How do I prevent fabric distortion when working large satin stitch areas?
A: To keep your fabric flat and your stitches even, always use an embroidery hoop to maintain consistent tension. Choose a high-quality hoop that holds fabric securely without overstretching. Work in alternating stitch directions and avoid pulling the thread too tightly. For especially large or delicate areas, consider stabilizing the fabric with an interfacing or backing layer. Remember: the smoother your foundation, the more flawless your satin stitches will appear.