1. Introduction to Water Soluble Stabilisers
Water soluble stabilisers are the unsung heroes behind many flawless embroidery projects. Acting as temporary support, these stabilisers dissolve completely in water, leaving your fabric free from residue or stiffness—a dream come true for anyone working with delicate materials or intricate designs. Whether you’re aiming for crisp freestanding lace, tackling textured terrycloth, or embroidering on sheer organza, water soluble stabilisers ensure your stitches stay sharp and your fabric remains undamaged. Throughout this guide, we’ll explore the different types of water soluble stabilisers, their ideal uses, expert application techniques, troubleshooting tips, environmental impact, cost-saving strategies, and fabric-specific solutions. If you’re ready to elevate your embroidery with professional results and fewer headaches, let’s dive in!
Table of Contents
- 1. Introduction to Water Soluble Stabilisers
- 2. Types and Applications of Water Soluble Stabilisers
- 3. Step-by-Step Usage Techniques
- 4. Troubleshooting Removal Challenges
- 5. Environmental Impact and Safety
- 6. Cost-Effective Utilization Strategies
- 7. Fabric-Specific Stabilization Guide
- 8. Conclusion: Mastering Stabilizer Selection
- 9. FAQ: Water Soluble Stabiliser Essentials
2. Types and Applications of Water Soluble Stabilisers
Water soluble stabilisers come in a surprising variety, each tailored for specific fabrics, designs, and creative ambitions. Understanding their differences—and how to match them to your project—can make the difference between “almost right” and “absolutely stunning.”
2.1 Film vs Fabric Variants: Core Categories Explained
Water soluble stabilisers generally fall into two main categories: film-based and fabric-like variants.
Film-Based (Plastic-Like) Stabilisers
These look and feel like clear plastic sheets. Brands such as Sulky Solvy and OESD StitcH2O are popular choices. Film-based stabilisers are ideal for:
- Sheer and Transparent Fabrics: Use lightweight films like Sulky Solvy or OESD AquaMesh for organza, tulle, or chiffon. They prevent residue and keep your embroidery invisible from both sides.
- Textured Fabrics: As a topping, films like StitcH2O keep stitches from sinking into high-pile materials such as terrycloth and fleece, ensuring crisp, visible embroidery.
Key Features:
- Dissolve easily in water.
- Available in various weights—thinner for topping, heavier for backing or freestanding lace.
- Some, like OESD AquaMesh, resist moisture absorption and rinse cleanly.
Fabric-Like (Thicker Backings) Stabilisers
These resemble nonwoven fabric or interfacing. BadgeMaster (OESD) and Sulky Fabri-Solvy are notable examples. Fabric-like stabilisers are best for:
- Freestanding Lace & Dense Designs: Their strength supports intricate, stitch-heavy patterns without fabric underneath.
- Patches & Appliqué: They provide a stable foundation and clean removal for standalone motifs.
Key Features:
- Heavier weight for robust support.
- Can be doubled up for extra stability.
- Often preferred for larger or denser lace projects.
Brand Comparisons & Performance Insights
| Brand/Type | Key Features | Best For |
|---|---|---|
| OESD AquaMesh | Opaque mesh, moisture-resistant | Freestanding lace, lightweight fabrics |
| OESD BadgeMaster | Heavyweight, no residue | Dense stitching, freestanding appliqué |
| Kimberbell Wash-Away | Single-layer efficiency, minimal glue | Freestanding lace, delicate fabrics |
| Sulky Ultra Solvy embroidery digitizing software | Heavy-duty film | Sheer fabrics, open designs |
| StitcH2O | Textured topping, prevents sinking | Terry cloth, felt, napped fabrics |
Layering Efficiency: Some brands, like Kimberbell Wash-Away, deliver results with a single layer, while others (such as OESD) may recommend layering (e.g., AquaMesh + BadgeMaster) for optimal stability in demanding designs.
Glue Content: Watch for excessive adhesive in some stabilisers, as it can leave residue and require extra rinsing.
Technical Considerations
- Removal: Most stabilisers dissolve with warm water; some (like Kimberbell) recommend spritzing to avoid full immersion.
- Adhesive Options: AquaMesh Plus comes pre-coated for tricky-to-hoop items, while temporary spray adhesives can be paired with heavy-duty films for added hold.
In summary: Film-based stabilisers excel for sheer and textured fabrics, while fabric-like stabilisers shine in freestanding lace and dense stitch applications. Choosing the right type means cleaner results and easier removal—no more guesswork, just embroidery magic.
2.2 Project-Specific Applications: From Lace to Terrycloth
Let’s get practical—what stabiliser should you use for that towel, lace ornament, or even a quirky toilet paper embroidery?
Freestanding Lace
- Best Choice: Heavy-duty films (e.g., BadgeMaster, Sulky Ultra Solvy) or fabric-like stabilisers (e.g., Fabri-Solvy, doubled up for extra strength).
- Why: These provide the structure needed for intricate lace to hold its shape after the stabiliser washes away.
- Pro Tip: OESD suggests combining AquaMesh as a backing with BadgeMaster as a topping for maximum stability.
Delicate & Sheer Fabrics
- Best Choice: Lightweight film-based stabilisers (AquaMesh, Sulky Solvy).
- Why: They dissolve cleanly, leaving no visible residue—perfect for organza, tulle, or chiffon where both sides show.
- Bonus: Also great for tutus or mesh, where you don’t want traditional backings to show through.
Textured & High-Pile Materials (Towels, Fleece)
- Best Choice: Water soluble toppers like StitcH2O.
- Why: Prevents stitches from sinking into the nap, keeping designs clear and raised.
- How: Layer a base stabiliser under the fabric, with WSS topping above for best results.
Unique Uses
- Toilet Paper Embroidery: Yes, it’s a thing! Use StitcH2O to prevent perforations from tearing during stitching.
- Patches & Freestanding Appliqué: Heavy-duty films or fabric-like stabilisers let you embroider directly onto the stabiliser, then wash it away for a clean, standalone patch.
In a nutshell: Match the stabiliser’s strength and type to your project’s needs. Heavy-duty for lace, lightweight for delicate fabrics, and textured toppers for towels or fleece. With the right choice, your embroidery will stand out—literally and figuratively.
3. Step-by-Step Usage Techniques
Mastering water soluble stabilisers isn’t just about picking the right product—it’s about applying it with precision for flawless results. Let’s break down the essential techniques, from hooping to post-stitch care.
3.1 Hooping Methods and Layering Strategies
Standard Hooping
1. Hoop the Base Stabiliser: Place your base stabiliser (such as a sticky tearaway or cutaway) in the hoop.
2. Add Fabric: Position your fabric on top, securing with spray adhesive or basting stitches if needed.
3. Apply Water Soluble Stabiliser (WSS): Lay the WSS over the fabric, aligning it with the embroidery area.
Hoopless Technique (for Thick Fabrics like Towels)
1. Hoop the Stabiliser Only: Use a sticky base stabiliser in the hoop.
2. Float the Fabric: Press your towel or thick fabric onto the sticky stabiliser.
3. Pin WSS on Top: Place the WSS over the fabric and pin it around the hoop’s outer edges—avoiding needle paths.
| Fabric Type | Layering Approach | Stabiliser Type |
|---|---|---|
| Terry cloth, fleece | Base stabiliser → Fabric → WSS (topping) | Sticky tearaway + WSS |
| Stretchy knits | Base stabiliser (tearaway/cutaway) → Fabric | Avoid WSS as backing |
| Denim, jeans | Adhesive-backed WSS → Fabric → Stitching | Adhesive WSS |
Key Tips:
- Always test your stabiliser and fabric combo with a sample stitch-out.
- Use heavy-weight, clear WSS (e.g., Sulky Ultra Solvy) for visibility in complex designs.
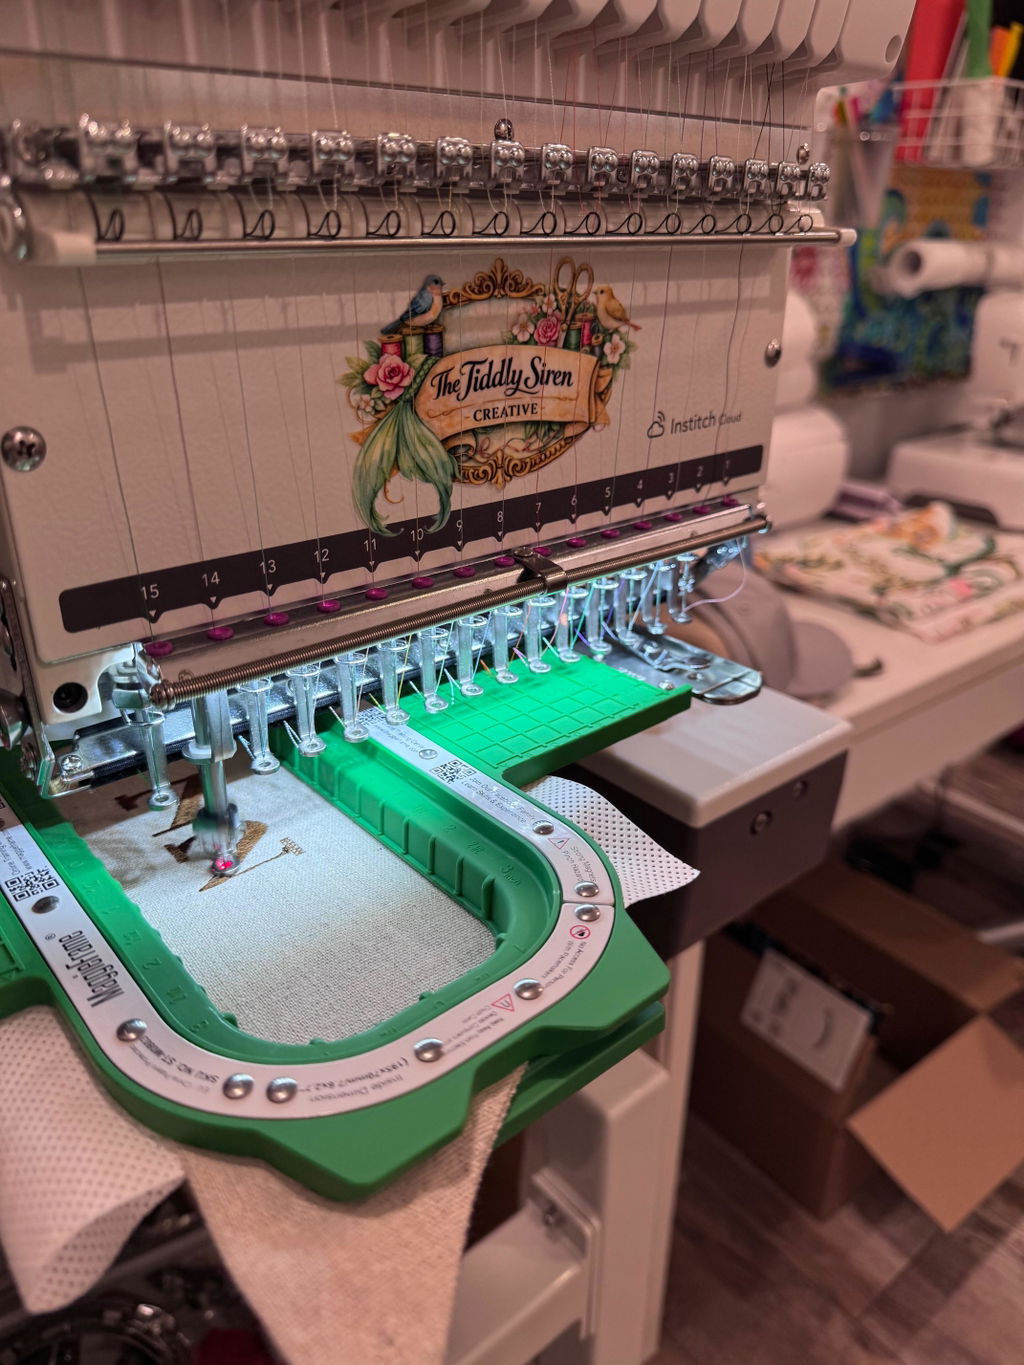
- For garment embroidery, MaggieFrame magnetic hoops offer superior stability. Their powerful magnetic system ensures even tension, especially when layering stabilisers, and makes hooping thick or delicate garments effortless—no more wrestling with screws or risking fabric distortion.
Why MaggieFrame?
With MaggieFrame’s even tension and quick setup, your fabric stays flat and secure, reducing puckering and misalignment. Whether you’re a pro or a passionate hobbyist, this magnetic hooping system streamlines your workflow and elevates your results.
3.2 Removal and Post-Embroidery Care
After the last stitch, proper stabiliser removal is crucial for a professional finish.
Step-by-Step Removal
1. Peel Excess Stabiliser: Gently tear or cut away as much WSS as possible from the design’s edges.
2. Soak in Lukewarm Water: Submerge your project in lukewarm water (not hot or cold) and gently agitate. This dissolves the remaining stabiliser without damaging fabric or threads.
3. Rinse Thoroughly: Rinse under running water, using your fingers to help dissolve stubborn bits. For intricate areas, a spray bottle can target small spots.
4. Dry Flat: Pat dry with a towel and lay the piece flat to air dry. Avoid wringing, as this can distort delicate stitches.
Pro Tips:
- Ink Bleed Warning: If you traced your design, use washable pens or pencils—otherwise, ink may bleed during soaking.
- MaggieFrame’s Advantage: During washing, MaggieFrame’s even tension helps maintain fabric integrity, minimizing distortion and keeping your masterpiece looking crisp.
By following these expert techniques, you’ll achieve embroidery that’s as beautiful after washing as it was in the hoop—no sticky residue, no fabric warping, just pure creative satisfaction.
Ready to try these techniques?
Experiment with your favorite stabilisers, and don’t forget: for garment embroidery, MaggieFrame magnetic hoops can be your secret weapon for flawless results every time.
4. Troubleshooting Removal Challenges
Water soluble stabilisers promise a magical, residue-free finish—but sometimes, reality throws a sticky curveball. If you’ve ever found your masterpiece marred by stubborn residue or worried about damaging delicate fabrics during removal, you’re not alone. Let’s tackle these common challenges with expert-backed solutions and a few real-world hacks.
4.1 Solving Sticky Residue and Incomplete Dissolution
Nothing saps the joy from finishing an embroidery project like discovering gummy residue clinging to your stitches. So, what’s behind this sticky situation?
Common Causes:
- Insufficient rinsing: Residual stabiliser particles get trapped in fabric fibers.
- Incorrect water temperature: Cold water may not fully dissolve the stabiliser, while boiling water risks fabric damage.
- Improper removal techniques: Inadequate massaging or pressing during rinsing leaves bits behind.
- Stabiliser density: Thicker or multiple layers can resist dissolving without extra help.
Proven Solutions:
- Thorough rinsing: Submerge your project in lukewarm water (30–40°C/86–104°F). Gently massage the area and repeat until the water runs clear. This is the "sweet spot"—warm enough to dissolve, gentle enough to protect.
- Targeted removal: For stubborn spots, use a spray bottle to mist water directly onto the residue. Press with your fingers or a damp cloth to work it free. This trick, shared by seasoned embroiderers and YouTube creators, can save you hours of picking at tiny bits.
- Mechanical removal: Always tear or cut away as much stabiliser as possible before rinsing. This minimizes what you have to dissolve and reduces the risk of sticky leftovers.
- Heat-assisted methods: For thick, multi-layered stabilisers, place a damp cloth over the area and apply a warm iron (never directly on the fabric). The gentle heat accelerates breakdown—just don't overdo it!
- Fabric softener or shampoo: Some users find that adding a small amount of fabric softener or mild shampoo to the water helps dissolve stubborn adhesive remnants.
Prevention Tips:
- Pre-wet the stabiliser: Lightly mist before rinsing to jumpstart dissolution.
- Avoid over-layering: Use only as many layers as necessary for your project's density.
- Double-check your stabiliser: Make sure you're using a true water-soluble product—heat-away stabilisers won't dissolve in water!
Real-User Hack: One clever tip from the embroidery community: use a tennis ball in your rinse water to help collect loose stabiliser particles, keeping your fabric cleaner and your drain clearer.
| Issue | Solution |
|---|---|
| Sticky residue | Soak 5–10 minutes in warm water, then rinse |
| Incomplete dissolution | Iron with damp cloth to apply heat safely |
| Stubborn bits | Spray bottle misting, gentle finger pressing |
| Mechanical removal | Tear/cut excess before soaking |
Critical Insight: Always confirm your stabiliser is water-soluble before troubleshooting. Non-water-soluble types require different removal methods altogether.
4.2 Preventing Fabric Damage During Removal
You've conquered the sticky residue, but now you're worried about harming your fabric. Here's how to keep your embroidery—and your nerves—intact.
Risks to Watch For:
- Excessive heat: Boiling water or direct ironing can shrink or scorch delicate fabrics.
- Stretching: Hanging wet fabric can distort embroidery, especially on knits or sheers.
- Aggressive scrubbing: Harsh friction damages both stitches and fabric.
Safe Removal Practices:
- Air-dry flat: After rinsing, lay your project on a clean towel and reshape as needed. This prevents distortion and keeps stitches crisp.
- Gentle agitation: Use your fingertips or a soft-bristle brush to remove residue—never a rough scrubber.
- Temperature control: Stick to lukewarm water and avoid direct heat from irons. For heat-assisted removal, always use a damp cloth barrier.
- Compatibility testing: Before tackling a full project, test your stabiliser and removal method on a fabric scrap. This is especially crucial for silks, rayons, or other heat-sensitive materials.
Video Demonstration Insight: Many embroidery tutorials recommend gentle handling and air-drying to prevent shrinkage and puckering. Watching these techniques in action can be eye-opening—sometimes, less really is more.
Pro Tip: If you're ever in doubt, err on the side of caution: more gentle, less heat, and always flat drying.
5. Environmental Impact and Safety
Eco-conscious embroiderers, rejoice—water soluble stabilisers offer a cleaner, greener alternative to traditional options. But what’s really going down the drain when you rinse away that stabiliser? Let’s break it down.
Chemical Composition
Most water soluble stabilisers are made from polyvinyl alcohol (PVA), a synthetic polymer that dissolves fully in water. Some brands, like SmartSolve, even use plant-based biodegradable materials, while others incorporate nylon spun polymesh or wood pulp (as in Paper Solvy). Regardless of the blend, their defining trait is complete water solubility—no lingering microplastics or fibers.
| Material Type | Examples | Key Characteristics |
|---|---|---|
| Polyvinyl Alcohol (PVA) | Sulky Solvy, Fabri-Solvy | Synthetic, non-toxic, dissolves fully |
| Plant-Based Biodegradable | SmartSolve | Eco-friendly, minimal impact |
| Nylon Polymesh | Clear Topping Film | Non-toxic, safe for skin-contact |
| Wood Pulp | Paper Solvy | Needs thorough rinsing to avoid residue |
Non-Toxicity and Safety
Manufacturers like Sulky confirm their water soluble stabilisers are non-toxic and safe for use on skin-contact fabrics. There’s no evidence of harmful chemicals being released during use or disposal, and decades of use—even with septic systems—have shown no adverse effects. Plant-based options further reduce allergy and sensitivity risks.
Key Safety Points:
- No harmful chemicals or toxic residues
- Septic-safe with thorough rinsing
- Allergy-friendly, especially with plant-based stabilisers
Ecological Impact
Water soluble stabilisers shine when it comes to environmental performance:
- Zero plastic residue: Unlike tear-away or cut-away stabilisers, which can leave microfibers, water soluble options dissolve completely, eliminating microplastic pollution.
- Biodegradability: Plant-based materials break down naturally, reducing landfill waste.
- Efficient rinsing: Most products dissolve quickly, minimizing water use and avoiding chemical runoff.
| Factor | Water-Soluble Stabilizers | Tear-Away/Cut-Away Stabilizers |
|---|---|---|
| Material | PVA, plant-based, nylon | Polyester, cotton, adhesive-coated |
| Post-Use Residue | None (dissolves completely) | Fibers may remain in fabric/drains |
| Environmental Impact | Minimal (biodegradable) | Higher (plastic waste, microfibers) |
| Safety | Non-toxic, septic-safe | Potential chemical residues |
Conclusion: Water soluble stabilisers aren’t just kind to your embroidery—they’re kind to the planet, too. Their non-toxic, fully dissolvable nature and biodegradable options make them a top pick for eco-minded stitchers.
6. Cost-Effective Utilization Strategies
Let’s face it: budget-friendly embroidery supplies like cheap embroidery machines add up. But with a few clever tricks, you can stretch your water soluble stabiliser budget further and reduce waste—without sacrificing quality.
6.1 Scrap Management and Bulk Usage
Trim Excess Before Stitching: Cut away stabiliser around your design before you start stitching. This simple step minimizes waste and prevents clumping during dissolution. For appliqué or dense designs, trim around the edges post-stitching to further reduce residue.
Recycle Scraps via Reconstitution: Don’t toss those leftover bits! Gather small stabiliser remnants and patch them together with a glue stick. Dry quickly with a hairdryer to prevent premature dissolving—this "patchwork" sheet can be used for future projects. The glue dissolves right along with the stabiliser, leaving no trace.
Optimize Dissolution Efficiency: Use hot water (not boiling) to dissolve stabiliser faster, saving time at the sink. Instead of soaking, gently scrub with your fingertips under running water for effective residue removal.
Adhesive Alternatives and Stabiliser Reuse:
- Sticky stabilisers (e.g., Sulky Sticky Fabri-Solvy): Attach fabric to the sticky side, stitch, trim away excess, and reuse the remaining sticky surface by hooping it again for a new project.
- Spray adhesives: Apply to the stabiliser (not the fabric) for temporary bonding, eliminating the need for pins or extra layers.
- Needle care: Clean needles with alcohol or Goo Gone after using sticky stabilisers to prevent thread breaks from glue buildup.
Bulk Usage Strategies:
- Select by weight and purpose: Use lighter-weight stabilisers for toppers or fine stitching, heavier ones for dense designs. Always test combinations to avoid wasted materials.
- Water-saving: For large projects, trim excess stabiliser before assembly and wash the finished piece to dissolve any remaining residue.
- Reuse in multi-layer designs: For stretchy or high-pile fabrics, hoop stabiliser and fabric together to maintain tension and extend stabiliser life.
| Strategy | Benefits |
|---|---|
| Trimming excess stabiliser | Reduces dissolution time and residue |
| Reconstituting scraps | Lowers material costs |
| Sticky stabilisers | Reuse stabiliser, eliminate fabric hooping |
| Hot water dissolution | Accelerates removal process |
By adopting these savvy habits, you’ll make every inch of stabiliser count—saving money, reducing waste, and keeping your workflow smooth.
6.2 Weight-Based Selection and Water-Saving Techniques
Choose Stabiliser by Project Density:
- Lightweight stabilisers: Ideal for lettering, fine details, or as a topping on napped fabrics.
- Heavyweight stabilisers: Best for freestanding lace, patches, or dense designs that need robust support.
Pre-Wetting and Minimal Layering: Lightly misting the stabiliser before rinsing helps it dissolve faster and more evenly. Avoid unnecessary layering—use only as many layers as your design demands to reduce both residue and cost.
Test for Compatibility: Always run a test stitch-out with your chosen stabiliser and fabric. This ensures you’re not wasting materials on incompatible combinations.
Pro Tip: For large, multi-hoop projects, remove excess stabiliser from each section before final assembly and washing. This not only saves stabiliser but also reduces the amount of water needed for thorough rinsing.
Ready to save time, money, and the planet—all while keeping your embroidery flawless? Try these cost-effective strategies and watch your stabiliser go the extra mile!
7. Fabric-Specific Stabilization Guide
When it comes to embroidery, one size never fits all—especially with water soluble stabilisers. The right stabiliser can mean the difference between a flawless finish and a fabric fiasco. Let’s break down expert strategies for sheer, high-pile, and stretch fabrics, so your stitches always shine.
7.1 Sheer Fabrics and Freestanding Lace
Sheer fabrics like organza, tulle, and mesh are the embroidery world’s divas—delicate, translucent, and utterly unforgiving of mistakes. Freestanding lace, on the other hand, needs a stabiliser that supports intricate stitches but vanishes completely, leaving only your artistry behind.
Best Stabiliser Choices:
- Plastic-like Films (e.g., AquaMesh): These transparent, water-soluble films provide crucial support without leaving a trace. They’re ideal for organza, tulle, and mesh, ensuring your stitches float beautifully without visible backing.
- Soluble Paper (e.g., Sulky Fabri-Solvy): For lightweight designs or when you need to transfer a design, soluble paper is a go-to. It dissolves cleanly and is especially handy for design placement on tricky fabrics.
How to Use:
- Backing: Hoop the stabiliser together with your sheer fabric. This prevents distortion and puckering during stitching—crucial when every thread is visible.
- Topping: For ultra-delicate materials, float a layer of stabiliser on top to keep stitches crisp and prevent sinking.
Design Transfer Tips:
- Trace or print your design directly onto soluble paper stabiliser (like Sulky Stick & Wash). Place it on your fabric, stitch, and then rinse away—no risk of ink bleeding or ghost lines.
Freestanding Lace Magic:
- Use heavy-duty films like Sulky Ultra Solvy or double up on fabric-like stabilisers such as Fabri-Solvy for intricate lace. Designers often recommend two layers for extra strength, especially with dense patterns. After stitching, simply soak in water and watch the stabiliser disappear, leaving your lace to stand on its own.
Why It Works: Plastic-like films maintain transparency and structure, while soluble paper offers easy design transfer and residue-free removal. The result? Impeccable, floating embroidery on even the most ethereal materials.
7.2 High-Pile and Stretch Fabrics
Textured towels, plush fleece, and bouncy knits all present unique embroidery challenges. Stitches can vanish into the nap, or stretchy fabrics may distort under tension. Here’s how to keep your designs crisp and your fabrics happy.
Best Stabiliser Choices:
- Water-Soluble Films (e.g., New Brothread Wash Away): As a topping, these films prevent stitches from sinking into high-pile fabrics like terrycloth and fleece. They also dissolve cleanly, leaving no crunchy residue.
- Liquid Stabilisers (e.g., StitcH2O): Brush or spray onto knits or textured surfaces to create a temporary, smooth canvas for your embroidery.
How to Use:
- Terrycloth & High-Pile:
- Hoop a base stabiliser with your towel or fleece.
- Place water-soluble film on top before stitching. This keeps stitches raised and legible, not lost in the fluff.
- For extra stubborn nap, consider a liquid stabiliser as a topper.
- Stretch Knits:
- Apply liquid stabiliser as a topping to maintain stretch and prevent distortion.
- For dense designs, layer film stabilisers as backing, but avoid excessive layering to preserve fabric elasticity.
Tension Matters: Maintaining even tension is critical with stretch fabrics. Use a hooping system that supports the fabric without overstretching—this keeps your design in place and your fabric’s bounce intact.
Removal Techniques:
- Dissolve films or papers in cold or warm water. For any lingering residue, a fabric softener mixture (1 part softener to 12 parts water) can help.
- Always air-dry flat to prevent stretching or warping.
Pro Tips:
- For mesh or open-weave materials, use plastic-like film as a backing to stabilize stitches without visible support.
- For design transfer on terrycloth or unmarked fabrics, soluble paper is your friend—trace, stitch, and rinse away.
Quick Comparison Table:
| Stabilizer Type | Best For | Fabric Examples | Removal Method |
|---|---|---|---|
| Plastic-like Film | Freestanding lace, sheer fabrics | Mesh, organza, tulle | Cold/warm water |
| Soluble Paper | Light embroidery, design transfer | Chiffon, voile | Water immersion |
| Liquid Stabilizer | High-pile, stretch knits | Terrycloth, fleece, spandex | Fabric softener mixture |
Bottom Line: By matching your stabiliser to your fabric’s quirks—whether it’s transparency, texture, or stretch—you’ll unlock professional results on even the trickiest materials. No more sunken stitches or warped designs—just embroidery that pops, every time when embroidering on shirts and stretch knits with embroidery machine for shirts.
8. Conclusion: Mastering Stabilizer Selection
Choosing the right water soluble stabiliser is both an art and a science. Match the stabiliser type to your fabric and project, prioritize gentle but thorough removal, and embrace cost-saving habits like recycling scraps. With these strategies, you’ll elevate your embroidery from ordinary to outstanding—no sticky residue, no fabric drama, just pure creative joy.
9. FAQ: Water Soluble Stabiliser Essentials
9.1 Q: Can you print designs on water soluble stabilizer?
A: Yes, you can! Products like Sulky Stick & Wash Away printable stabilizer are designed to fit standard printers. Simply print or trace your design onto the stabilizer, adhere it to your fabric, stitch, and rinse away for a flawless transfer.
9.2 Q: Is a stabilizer necessary for hand embroidery?
A: While not strictly required, using a stabilizer—especially on stretchy, thin, or delicate fabrics—can prevent puckering and distortion. Water soluble stabilizers are especially helpful for see-through materials, as they dissolve completely after stitching.
9.3 Q: How do you prevent residue when removing water soluble stabilizer?
A: Trim excess stabilizer before rinsing. Submerge your project in warm water and gently rub the area to dissolve any remaining stabilizer. For stubborn spots, rinse under running water or use a soft brush. Always air-dry flat to keep your embroidery crisp and residue-free.