Introduction
1. Introduction to MaggieFrame 12.4×15.6 (ST-M1316) Magnetic Hoop
1.1 MaggieFrame Magnetic Hoop Series
As of today, MaggieFrame has developed 17 different sizes of magnetic hoops. From the classic 0505 to the popular 0813, each hoop is known for its consistent quality and positive feedback. For larger designs, we offer four big sizes: ST-M1113, ST-M1212, ST-M1316, and the largest—ST-M1716. Among them, the ST-M1316 (12.4×15.6") is the most popular choice for jacket backs, sweatshirt logos, and larger embroidery projects.

Before purchasing, please note: due to their larger size, these hoops may not fit machines with short arms or tight inner corners near the arm joints. That’s why we always reach out before shipping large hoops to confirm compatibility and help avoid any issues later. Also, if we receive frequent reports of fit issues with certain machine models, we may remove that hoop size from the listing for that brand. So you might notice that not all hoop sizes are available for every machine brand.

If your machine is compatible with the ST-M1316 magnetic hoop and you're considering making a purchase, we invite you to keep reading. Especially for small to mid-sized embroidery businesses, having the right information is key to making a smart investment. At MaggieFrame, we know our products inside and out—and we're committed to sharing honest, practical insights to help fellow embroiderers make confident decisions.
1.2 Specifications & Compatibility of ST-M1316
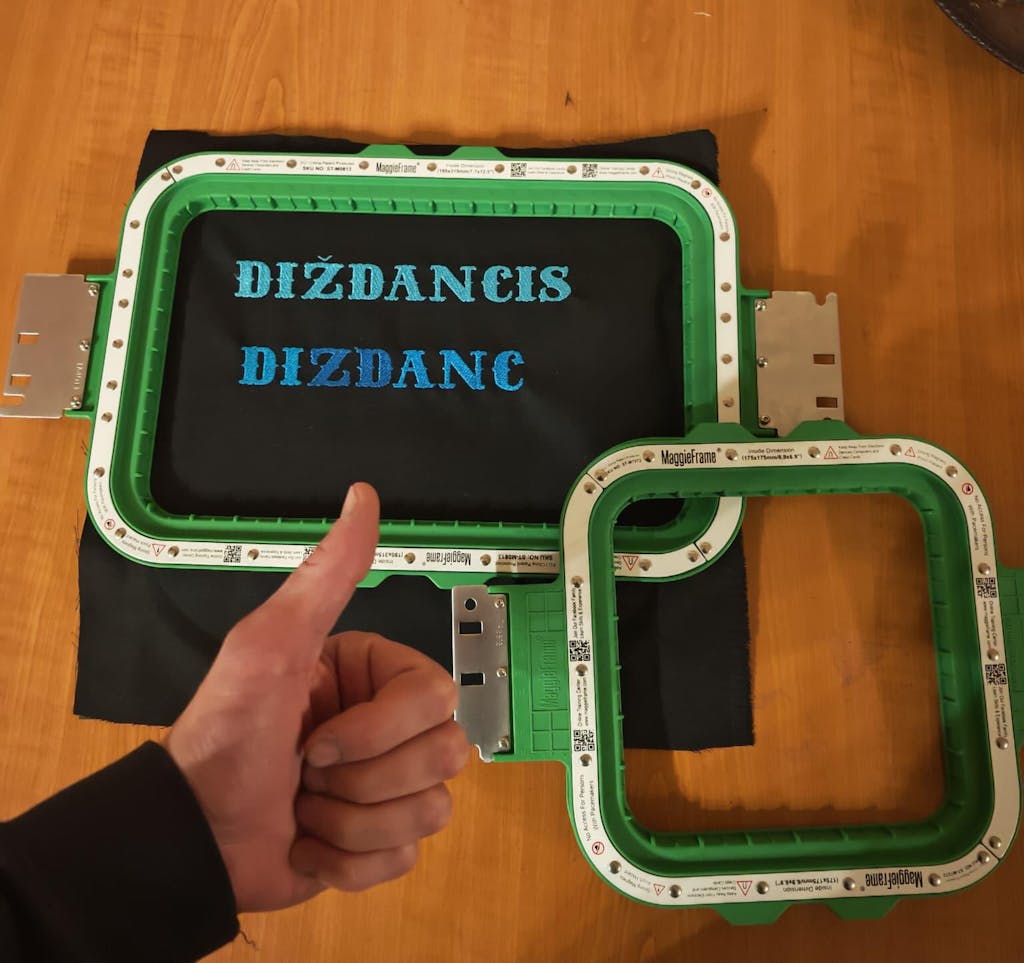
The inner dimensions of this embroidery hoop are 315×395 mm (12.4×15.6"), but the actual embroidery area may be about 15 mm (0.6 inch) smaller, depending on your machine brand.
All MaggieFrame ST-M1316 magnetic hoops are identical in structure—they use the same high-quality materials and connection design. The only difference lies in the metal brackets, which are customized based on your machine model and selected arm length. This means if you upgrade your machine in the future, you won’t need to replace the entire hoop—simply swap out the brackets, and your MaggieFrame will continue to work seamlessly on your new machine. Our magnetic hoops have gone through several generations of upgrades, featuring premium plastic and magnet materials along with a unique structural design. With normal use, they are built to last for many years—far surpassing the durability of MightyHoop and other similar products. That’s why the flexible, detachable bracket system isn’t just convenient—it’s essential.

1.3 Packing List of the Magnetic Hoop
If you purchase a ST-M1316 magnetic hoop, your package will include the following three items:
- Magnetic hoop body x 1
- One pair of metal brackets fits your machine model
- A small accessory kit containing 10 anti-slip screws and 1 mini screwdriver

Each bracket only requires 3 screws for installation, but we include 10 in every package just in case any are lost. Our anti-slip screws follow the industry-standard 3.5 mm size, so replacements are easy to find if needed.
The metal brackets are used to attach the hoop securely to your machine’s arms. As long as the combined width of the hoop and brackets fits your machine, and the bracket holes align with your machine’s mounting points, the hoop will work properly. To ensure broad compatibility, your brackets may have more holes than you actually need—that’s completely normal.
Some customers may also notice large cutouts on the brackets and wonder about their purpose. These are designed to reduce weight and lower shipping costs. They do not affect function in any way.
Once you receive your full set, we recommend assembling the hoop and testing the bracket fit on your machine as soon as possible. You can scan the QR code printed on the hoop frame to access our official tutorial site: maggieframe.com. There, you'll find complete user guides for both magnetic hoops and positioning stations, along with quick-access multilingual guides to help you get started with ease.
2. How to Use the 1316 Magnetic Hoop
2.1 When to Use the 1316 Magnetic Hoop
When your embroidery design is slightly smaller than the inner dimensions of the hoop, the 1316 magnetic hoop is a good fit. For example, if your design is no larger than 10 inches × 13 inches, you can use it.
You can use the 1316 hoop on its own or pair it with the HoopTalent positioning station. HoopTalent brings two major benefits: it speeds up the hooping process—especially on garments—and ensures your embroidery lands in the same spot every time, which is key for professional results. For any embroidery business owner, it's a game-changer.
Next, we’ll show you how to use the 1316 industrial magnetic hoop both with and without the positioning station. To get started, you can either watch the video or follow the steps listed below. Let’s dive in!
2.2 Hooping Process Using the 1316 Hoop
Step 1:
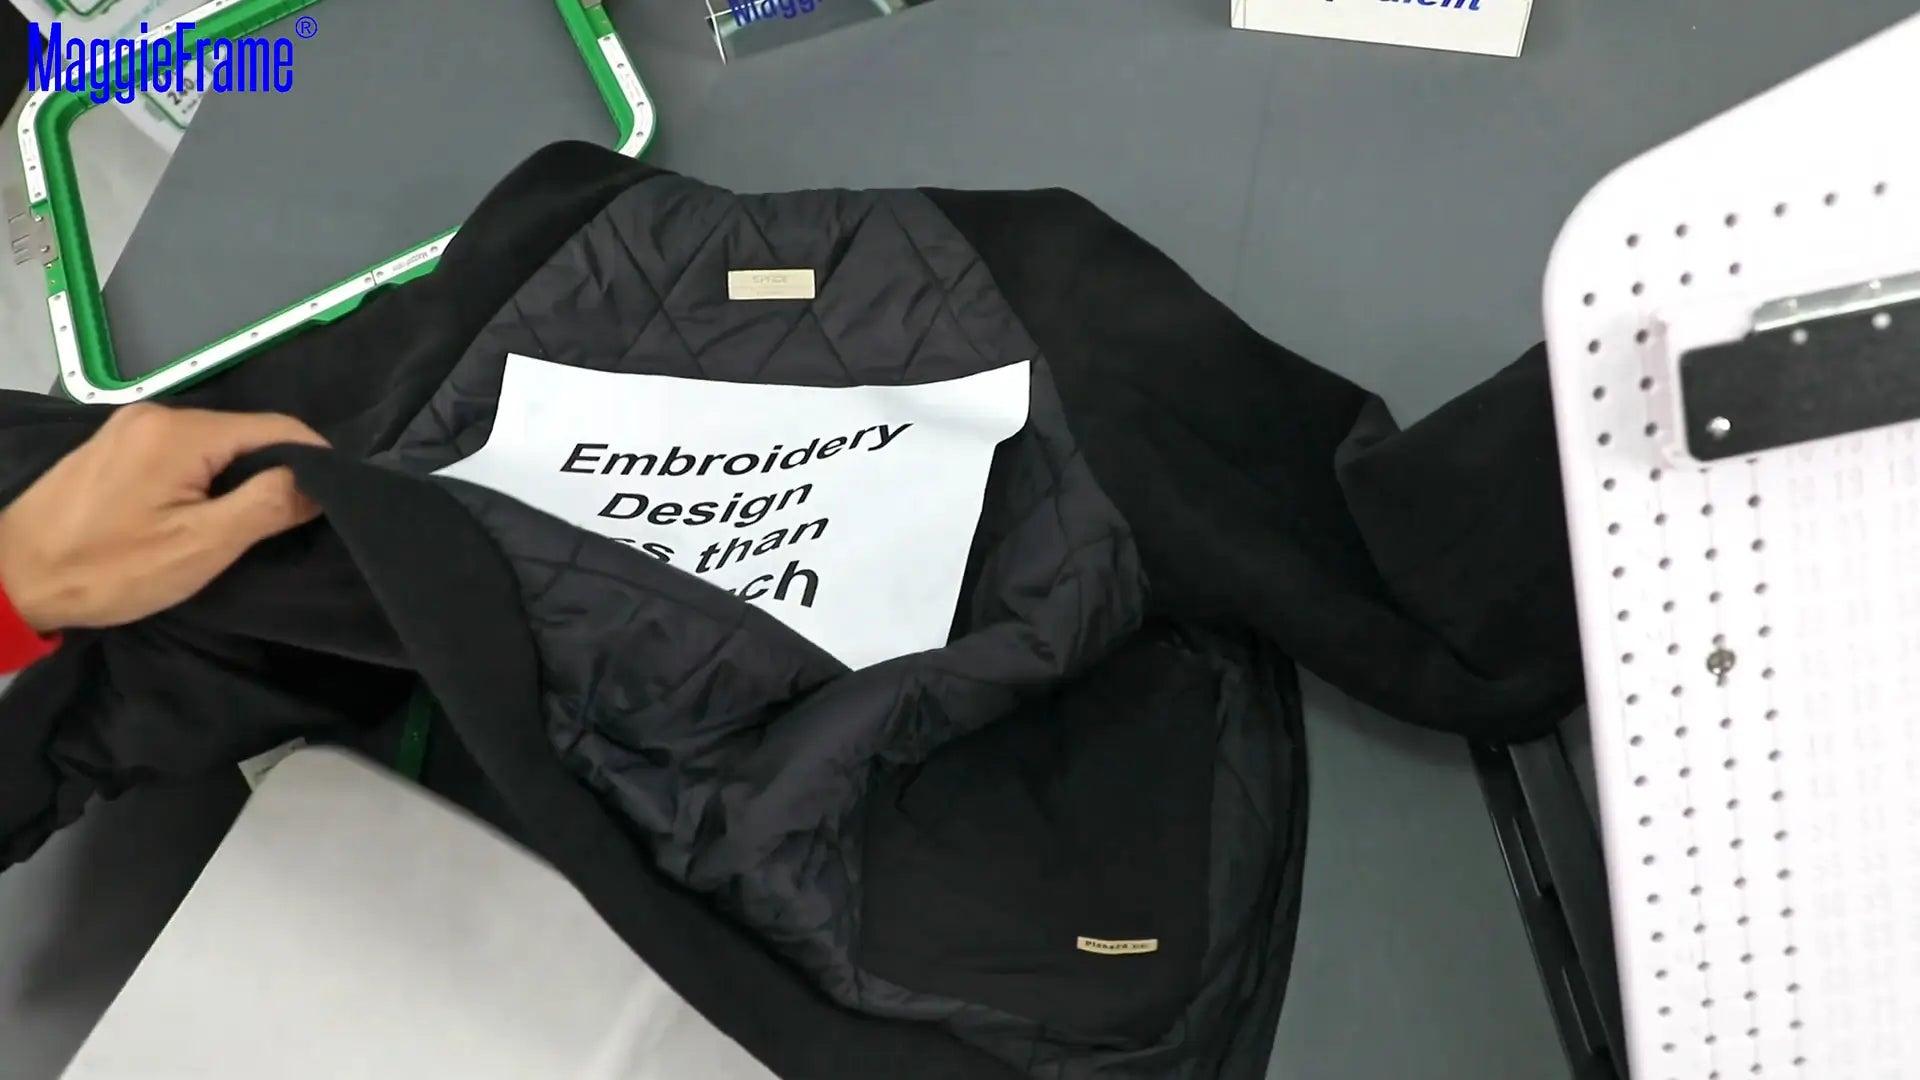
Separate the magnetic hoop into two parts. Place the bottom frame flat on your work surface. This will be the base where you align your stabilizer and fabric. For jackets and thick garments, ensure the fabric is smoothed before proceeding.

Step 2:
Cut a piece of stabilizer slightly larger than the hoop’s outer dimensions and place it on top of the bottom frame. Then, lay your fabric on top of the stabilizer.
Use your fingers to gently trace around the inside edge of the bottom frame—like you're outlining a secret map—until your design is perfectly centered. This little trick helps keep your needle happy and away from the frame!

Step 3:
Align the top frame (with the metal brackets) and let the magnets snap together. The strong hold keeps even thick fabrics like hoodies or denim jackets smooth and wrinkle-free—something difficult with traditional hoops.

Now you’ll see that the stabilizer on the back is smooth and flat. Magnetic hoops have a natural advantage when securing thick fabrics. For lighter or thinner materials, achieving a smooth surface may take some practice and experience.

2.3 Hooping Process Using the 1316 Hoop with the HoopTalent Hooping Station
Let me briefly introduce what the HoopTalent hooping station is. HoopTalent is a fixture system specifically designed for MaggieFrame magnetic embroidery hoops. Except for our largest 1716 hoop—which is generally not recommended due to its size—all other MaggieFrame magnetic hoops are compatible with it. The biggest advantage? Consistency. For batch embroidery—like 50 jackets in one order—you can hoop each garment in under 30 seconds, compared to several minutes with manual hooping.
HoopTalent can also be used with some MightyHoop models, Sewtalent hoops, and other brands. If you plan to use it with any non-MaggieFrame hoops, we recommend checking with our customer service team before purchasing to confirm compatibility.

Here’s how to use the Main Station and the 1316 magnetic hoop to secure the same jacket—perfect for batch embroidery:
Step 1:
Place the jacket over the large hooping board and smooth out any wrinkles.
Step 2:
Insert the bottom frame of the hoop between the board and the jacket. Adjust its position so it aligns with the embroidery area, then press it down to hold it in place. Make sure the embroidery design area is centered inside the bottom frame.
Then remove the jacket—you’ll now see that the inside edge of the bottom frame sits above the letter "J" printed on the board. This letter acts as a handy reference point to help you remember the correct position of the frame.

Step 3:
Take the lower half of the larger universal fixture from your positioning station kit, and insert the two pins on its back into the appropriate holes underneath the bottom frame—making sure the edge of the bottom frame still aligns with the letter "J" on the board.

Now you might notice a slight shift in the alignment of the embroidery area within the frame. Don’t worry—this won’t affect your work, as you’ll fine-tune the exact position later on your embroidery machine.

With the lower fixture now supporting the bottom frame, it’s easy to know where the upper fixture should go. Place the upper fixture into the board and hand-tighten the screw on top. The bottom frame should now sit perfectly between the two fixtures.


For future reference, it's helpful to record your positioning data for this project on paper. We recommend writing it on a sticky note and placing it on the leg of the main station. This will save you time and make your hooping process faster and more consistent.
Step 4:
Now place the stabilizer on top of the bottom frame. The universal fixture comes with four black plates designed to lightly hold the stabilizer in place. These plates are intentionally not too tight, so the hooped garment can be removed easily. If the stabilizer is too thick or folded, it may not hold well—so trim it to a flat, fold-free size for best results.

You can now place your jacket back onto the station. If you plan to embroider multiple garments of the same type, be sure to remember key placement points to keep the design position consistent across items.

Final Step:
Now take the upper frame with brackets and place it on top—let the strong magnetic force snap the two frames together. Done! Your jacket is now perfectly hooped! At this point, you can grab the two metal brackets on the sides and easily lift the entire hoop and garment out of the station—ready to move it to your embroidery machine!

3. Is a Hooping Station Necessary?
Is a positioning station really necessary? In both mass production and personalized embroidery, it's often overlooked—but it makes a big difference. Whether you're handling large orders or aiming for consistent quality in custom work, a reliable positioning system can save time and improve accuracy.
When using the HoopTalent station with the MaggieFrame, the first jacket may take 3–5 minutes to hoop due to setup. But after that, each jacket takes just 20 seconds—ideal for repeatable production. Even for embroidery enthusiasts using industrial machines, the HoopTalent station is a helpful tool. You can mark common embroidery areas like the left chest on hoodies, the back collar of T-shirts, or the thigh area on jeans.
While a hooping station may seem optional, it quickly pays for itself. If you produce even 20–30 jackets per week, saving 2 minutes per garment adds up to several extra working hours saved every month—time you can spend fulfilling more orders.
Conclusion
The MaggieFrame 12.4×15.6" (ST-M1316) magnetic hoop is perfect for embroidery on jackets, hoodies, sweatshirts, and other thick garments. Paired with the HoopTalent station, it delivers faster hooping, repeatable accuracy, and professional-quality results. In this guide, we introduced its features, how to use it with or without a hooping station, and why positioning tools help improve accuracy. If you want better hooping speed and cleaner embroidery results, the 1316 frame is a smart choice. Just make sure your design fits the frame, and keep your tools clean and ready.
👉 Check the MaggieFrame 1316 Hoop in our Official Store: View Details
👉 Watch the full Tutorial on YouTube
QA
To help you quickly understand our ST-M1316 industrial magnetic hoop and positioning station kit, we've compiled a list of frequently asked questions about this topic. You might find these questions already answered in the video.
Q1: What materials and garments can I use with the 12.4×15.6" MaggieFrame?
A: This hoop is ideal for jackets, hoodies, tote bags, jeans, and other thick fabrics. You'll need a compatible industrial embroidery machine (e.g., Tajima, Barudan, SWF, Happy, etc.), a properly sized stabilizer (preferably medium-weight tear-away or cut-away), and of course, the 12.4×15.6" MaggieFrame with the correct brackets. A hooping station like HoopTalent is also highly recommended for accurate and repeatable positioning.
Q2: How long does the hooping process typically take with the MaggieFrame?
A: It usually takes about 1 minute—and under 40 seconds with experience. If you’re using a positioning station like HoopTalent, the first hooping may take 3–5 minutes due to bracket and positioning setup. However, once the fixture is set, each following jacket typically takes only about 20–30 seconds to hoop, making it ideal for mass production.
Q3: How do I maintain and care for my MaggieFrame to ensure it lasts?
A: MaggieFrame doesn’t require special maintenance. To keep it in good condition, avoid dropping it or knocking the brackets against hard surfaces.
Q4: What are the differences between hooping on the table and using the HoopTalent main station?
A: Hooping on a flat table is suitable for occasional or small-batch work, but it requires more manual alignment and consistency. Using the HoopTalent main station provides fixed grid guides, repeatable placement, faster workflow, and significantly better alignment—especially in mass production.
Q5: Do you offer any other guides or tutorials on using the MaggieFrame for different embroidery projects?
A: Yes! We offer detailed video tutorials, written guides, and FAQ resources on our website and YouTube channel.
🔔 Subscribe to our YouTube channel
You'll also receive a printed instruction manual after you order the positioning station kit.