1. Introduction: Mastering Embroidery Pattern Creation
Embroidery pattern creation is a journey that blends creativity, technique, and a dash of curiosity—no matter your skill level. Whether you’re a seasoned stitcher or just picking up your first needle, the world of embroidery patterns opens up endless possibilities. In this guide, we’ll explore everything from hand-drawing and tracing, to harnessing digital tools like Canva and Procreate, and even leveraging beginner-friendly generators for those who claim they "can’t draw." You’ll discover step-by-step methods, free resources, fabric transfer hacks, and tips for choosing materials and stitches. Ready to transform your ideas into beautiful, stitchable art? Let’s dive in and unlock the secrets to custom embroidery pattern mastery.
| Fabric Type | Stabilizer Choice | Why It Works |
|---|---|---|
| Knits | Cut-away + adhesive spray | Prevents stretch distortion |
| Silk | Water-soluble film | Dissolves without residue |
| Leather | Tear-away + masking fabric | Cushions without sticking |
Table of Contents
- 1. Introduction: Mastering Embroidery Pattern Creation
- 2. Step-by-Step Pattern Creation Methods
- 3. Pattern Creation Without Artistic Skills
- 4. Digitizing Designs for Machine Embroidery
- 5. Free Resources and Fabric Transfer Techniques
- 6. Material and Stitch Selection Strategies
- 7. Advanced Execution and Troubleshooting
- 8. Conclusion: Your Path to Custom Embroidery Mastery
- 9. FAQ: Embroidery Pattern Essentials
2. Step-by-Step Pattern Creation Methods
Creating your own embroidery pattern can feel like a leap into the unknown, but with the right methods, it’s more like a guided adventure. Whether you prefer the tactile satisfaction of pen and paper or the precision of digital design, there’s a technique for everyone.
2.1 Hand-Drawing and Tracing Techniques
Hand-drawn patterns are where embroidery artistry truly begins. If you love the organic feel of sketching, start with a simple geometric shape—think rectangles or circles—and outline your design on fabric using a water-soluble pen or carbon transfer paper. For delicate, sketch-like effects, try a single strand of embroidery floss in a classic backstitch, as seen in countless tutorials and videos.
Direct Drawing on Fabric: Use water-soluble pens like Micron or Tulip to sketch your design directly onto the fabric. These marks vanish with a splash of water once your stitching is done, leaving only your handiwork behind.
Carbon Paper Transfers: Prefer to work from a paper sketch? Place carbon paper beneath your fabric, lay your drawing on top, and trace with a stylus. The design transfers cleanly, ready for stitching.
Wash-Away Stabilizer Method: For more complex designs, trace your artwork onto a thin, self-adhesive wash-away stabilizer. Tape it to a window or lightbox for easier tracing, then stick it to your fabric and stitch right through. When finished, dissolve the stabilizer in water—magic!
Hoop-Based Tracing: Secure your fabric in an embroidery hoop, then trace your design directly onto the taut surface. This not only helps with alignment but also keeps your stitches even and your fabric smooth.
Tips from the Pros:
- Always hoop your fabric tightly to prevent puckering and gathers.
- Use the smallest embroidery needle you can manage for neater, faster stitching.
- For larger designs, stitch in sections, repositioning your hoop as needed.
Customizing Your Method: Pixel-Stitch and similar tools offer comparison tables to help you pick the best transfer or tracing technique for your project. Whether you’re after free-form creativity or precise replication, there’s a workflow that fits.
2.2 Digital Design Tools: Canva to Procreate
Digital tools have revolutionized embroidery pattern design, making it accessible even if your drawing skills are, let’s say, “aspirational.” Canva and Procreate stand out for their user-friendly features and flexibility.
Canva for Custom Designs:
- Set Up Your Canvas: Create a design that’s one inch larger than your hoop (e.g., 8×8 inches for a 7-inch hoop). This ensures your pattern fits perfectly when printed.
- Add a Circle Template: Drop in a circle matching your hoop’s size to visualize your final layout and keep elements aligned.
- Import Images: Upload your own artwork or use Canva’s vast library of free graphics and fonts. Arrange, resize, and personalize to your heart’s content.
- Export and Print: Download your design as a PDF for crisp printing. Cut out your circle, tape it to the back of your fabric, and use a lightbox or window to trace the details with an erasable pen or chalk.
Procreate’s Vector Workflows: If you’re working on an iPad, machine embroidery software integrated with Procreate offers powerful vector-based drawing tools. Use layers to build up your design, experiment with color palettes, and create perfectly symmetrical elements. The app’s brush customization and color dropper make it easy to match threads and preview your finished piece.
House of Mahalo’s Step-by-Step Example:
- Open Canva, create a custom-sized design, and add a hoop-sized circle.
- Upload line drawings or find free images on Pixabay.
- Add text or numbers for personalization.
- Download and print your pattern, then transfer it to fabric using a light source and erasable pen.
- Stitch, erase marks, and admire your handiwork!
Grid Templates for Hoops: Canva’s grid templates help keep your design centered and symmetrical within the hoop, making alignment a breeze.
Key Considerations:
- Digital patterns should be sized at least one inch larger than your hoop for easy placement.
- Simplify intricate details for hand-stitching; digital tools can handle more complexity, especially for machine embroidery.
- Wash-away stabilizers are great for transferring digital prints directly to fabric.
With these digital tools, even “can’t-draw” beginners can create polished, professional-looking embroidery patterns in minutes.
3. Pattern Creation Without Artistic Skills
Not everyone is born with a sketchbook in hand—and that’s perfectly okay. Modern embroidery welcomes all, especially those using the best beginner embroidery machine for easy pattern creation.
3.1 Beginner-Friendly Tools: Canva Generators and AI
Canva shines as a beginner’s best friend. Its Pattern Generator transforms text prompts into seamless, stitch-ready patterns, while the element library offers endless shapes, lines, and grids for building custom designs.
How to Use Canva’s Pattern Generator:
- Open Canva and select the Pattern Generator.
- Enter a text prompt (e.g., “floral border” or “geometric stars”) and let the AI create a unique pattern.
- Adjust the grid size for more or fewer stitches—smaller grids mean higher stitch density and finer detail.
- Use the alignment tools for perfect symmetry.
Customization vs. Skill Level:
Perplexity’s comparison tables show that Canva offers high customization with minimal learning curve—perfect for those just starting out. For even more polish, browse Etsy for pre-made embroidery frames and outlines that can be dropped into your Canva design.
Tips for Success:
- Use Canva’s alignment and color tools to create balanced, vibrant layouts.
- Explore embroidery libraries (like EGA) for inspiration and free resources.
3.2 No-Tech Methods: Trace Paper and Carbon Transfers
Prefer to keep things analog? You don’t need fancy gadgets to make beautiful embroidery patterns.
Trace Paper Transfer:
Draw your design on lightweight trace paper, pin it to your fabric, and stitch through both layers. When finished, gently tear away the paper.
Carbon Transfer:
Place carbon paper between your fabric and a printed design. Trace over the lines with a stylus or dull pencil to transfer the image.
Stabilizer-Free Approaches:
Some Quora discussions highlight skipping stabilizers altogether—just use a pencil or erasable pen to sketch directly onto the fabric. For ultra-budget options, household items like a smartphone screen or window can serve as a makeshift lightbox.
Cost-Effective Solutions:
All these methods can be accomplished for under $5, making them perfect for beginners or anyone on a tight crafting budget.
With these beginner-friendly digital and manual techniques, anyone can create embroidery patterns—no artistic pedigree required. Whether you’re wielding a mouse or a pencil, your next masterpiece is just a few steps away.
4. Digitizing Designs for Machine Embroidery
The leap from hand-drawn or digital patterns to machine embroidery magic starts with digitizing—transforming your artwork into stitch instructions your embroidery machine can understand. Whether you’re a tech enthusiast or just embroidery-curious, mastering digitizing software is the bridge to professional results.
4.1 Software Showdown: Hatch vs. Wilcom vs. Inkscape
Embroidery digitizing software comes in many flavors, but three names consistently rise to the top: Hatch, Wilcom EmbroideryStudio, and Inkscape (with the Ink/Stitch plugin). Each offers distinct workflows, tools, and learning curves.
Hatch Embroidery
Hatch, recognized as best digitizing software for embroidery, is celebrated for its hybrid approach—combining auto-digitizing (quick, for simple designs) with manual control (for detail and precision). The workflow begins by importing your artwork (JPG, PNG, SVG), then using tools like Straight Line, Freehand, and Shape to trace or refine elements. Hatch’s standout features include:
- Manual/Auto Hybrid Workflow: Start with auto-digitizing for basic shapes, then jump into manual tweaks for stitch density, length, and angle.
- 3D Stitch Simulation: Preview your design in realistic 3D, catching issues before you ever thread a needle.
- Export Flexibility: Save editable files in .emb format, or export to machine-ready formats like .pes.
A bonus? Hatch offers a 30-day free trial—perfect for testing the waters before you commit.
Wilcom EmbroideryStudio
Wilcom leans into manual digitizing, rewarding those willing to learn its robust toolkit. Key features include:
- Efficiency Tools: Use Single Run for outlines (minimizing trims and travel stitches), and Column A for complex satin turns.
- Sequence Planning: Digitize from one side to another to reduce thread breaks and optimize machine flow.
- Node Placement: Precision control over every curve and corner, critical for intricate logos or text.
Wilcom supports a wide range of machine formats and is a favorite for commercial embroidery shops.
Inkscape (with Ink/Stitch)
While Inkscape isn’t embroidery software out of the box, its open-source nature and the Ink/Stitch plugin make it a powerful (and free!) option for vector prep and digitizing:
- Vector Optimization: Clean up artwork, simplify outlines, and prep for smooth conversion.
- Embroidery Conversion: Ink/Stitch translates vector paths into stitch instructions, supporting basic fill, satin, and stroke stitches.
- Technical Learning: Expect a steeper curve, but the price (free!) and community support make it a worthy contender.
| Feature | Hatch | Wilcom | Inkscape/Ink-Stitch |
|---|---|---|---|
| Digitizing Approach | Hybrid (auto + manual) | Manual-focused | Manual (vector-based) |
| Key Tools | Straight Line, Freehand | Single Run, Column A | Vector path tools |
| Optimization | 3D simulation preview | Sequence planning | Node & path editing |
| Export Formats | .emb, .pes, more | Multi-format | SVG, .pes (via plugin) |
| Learning Curve | Moderate | Advanced | Moderate/Advanced |
| Free Trial | Yes (30 days) | No | Free (open source) |
Pro Tips for Digitizing Success:
- Start Simple: Auto-digitizing is great for basic shapes, but always review and refine manually for best results.
- Sequence Matters: Plan your stitch order to minimize jumps and trims—your machine (and your sanity) will thank you.
- Test Stitch: Always run a sample before committing to expensive fabric or high-stakes projects.
Ready to level up? Hatch’s free trial is an excellent way to experiment with both auto and manual digitizing, while Wilcom and Inkscape offer deep customization for those who love to tinker.
4.2 Technical Best Practices: Density, Scaling, and Export
Digitizing isn’t just about tracing lines—it’s about engineering stitches that look great and hold up to wear, wash, and the quirks of your chosen fabric. Here’s how to get it right:
Stitch Density & Fabric Adjustments
- Thin or Stretchy Fabrics (e.g., silk, jersey): Use lighter stitch density to prevent puckering and distortion.
- Thick Fabrics (e.g., denim, towels): Increase density and consider longer stitches for coverage, but avoid excessive layering that can cause thread breaks.
- Leather/Vinyl: Keep designs light; dense stitching can perforate and weaken the material.
Stitch Type Guidelines
| Type | Use Case | Max Stitch Length |
|---|---|---|
| Satin | Smooth fills, logos | 5–7 mm |
| Fill | Textured backgrounds | 3–5 mm |
| Run/Backstitch | Outlines, details | 2–4 mm |
Source: Merchology stitch guidelines
Scaling & Node Placement
- Scalability: Modern software lets you resize designs without recalculating every stitch, but beware—scaling too far (beyond ±20%) can distort stitch angles and densities.
- Node Placement: In Wilcom and Inkscape, precise node editing ensures smooth curves and sharp corners, critical for text and logos.
Travel Stitch Minimization
- Use Single Run or similar tools to connect elements with minimal thread jumps. Fewer jumps mean fewer trims and a cleaner back (and front!) to your embroidery.
Exporting for Machine Use
- File Types: Export to your machine’s preferred format—.PES (Brother, Baby Lock), .EXP (Melco, Bernina), or .DST (Tajima, Barudan).
- Color-Object Lists: In Wilcom, track color changes and stitch order for efficient production.
- Test on Scrap: Always run a test stitch to confirm density, registration, and color transitions.
Pro Tips:
- Measure Twice, Digitize Once: Know your embroidery area before starting—garments, hats, and bags all have different max sizes.
- Save Editable Files: Keep a master file (.emb, SVG) for future tweaks.
- Continuous Learning: Manual digitizing has a learning curve, but the control and results are worth the effort.
Digitizing is where artistry meets engineering—master these technical best practices, and your designs will shine on any fabric, with any machine.
5. Free Resources and Fabric Transfer Techniques
Great embroidery starts with a great pattern—and you don’t have to break the bank to get started. Access free machine embroidery designs to download from online converters like Pixel-Stitch to clever transfer hacks, here’s how to turn your ideas (or favorite images) into stitchable reality.
5.1 Top Free Tools: Pixel-Stitch vs. Stitch Fiddle
When it comes to converting images into embroidery patterns, two free tools stand out: Pixel-Stitch and Stitch Fiddle. But which one fits your project?
Pixel-Stitch
- What it Does: Quickly turns images into cross-stitch patterns. Upload your photo, set stitch count, fabric size, and color palette. Pixel-Stitch maps DMC, Anchor, and Sulky thread colors automatically.
- Output: Generates a PDF pattern with color codes, thread requirements, and a clear legend—perfect for beginners.
- Best For: Simple, small projects, pixel art, or anyone just starting out.
- Limitations: Focused on cross-stitch; less control over complex or shaded designs.
| Tool | Strengths | Weaknesses | Best For |
|---|---|---|---|
| Pixel-Stitch | User-friendly, thread mapping | Cross-stitch only, basic control | Beginners, quick projects |
| Stitch Fiddle | Advanced color, large projects | Paid features for full control | Complex, detailed work |
| Ink/Stitch | Vector conversion, free | Steep learning curve | Custom vector-based designs |
| SewArt | Simple, low-cost | Minimal color control | Basic image-to-embroidery tasks |
Step-by-Step: Creating a Pattern
- Upload Image: Import your photo into Pixel-Stitch or Stitch Fiddle.
- Adjust Settings: Set stitch count, fabric size, and color palette.
- Preview & Export: Generate a PDF (Pixel-Stitch) or adjust grid settings (Stitch Fiddle).
- Manual Tweaks: For best results, adjust color shades and clean up details before stitching.
5.2 Transfer Mastery: Lightboxes, Frixion Pens, and Stabilizers
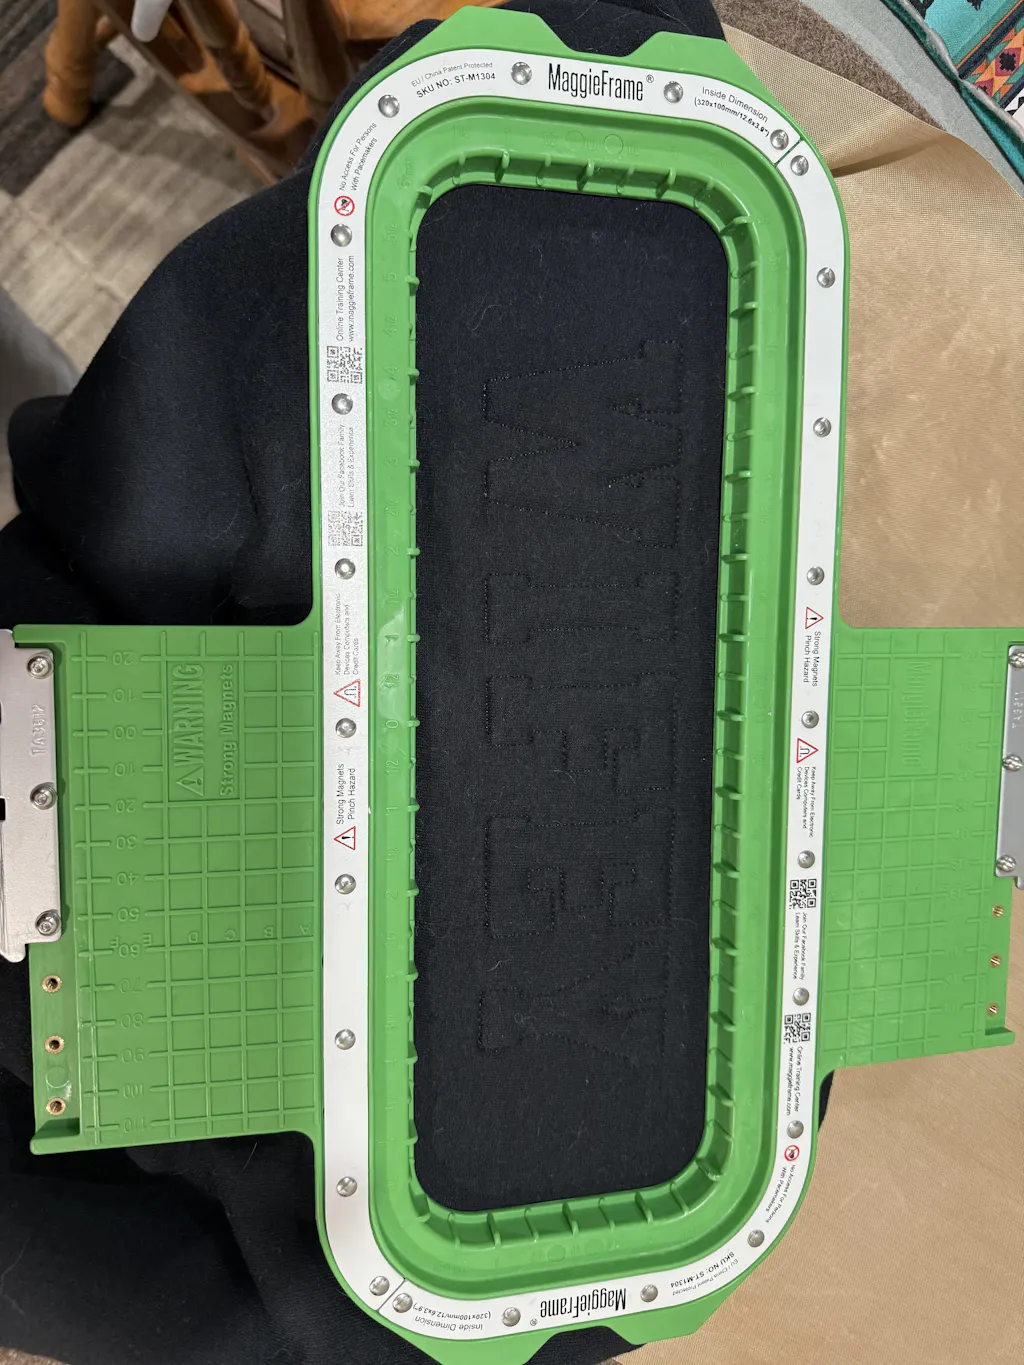
MaggieFrame Magnetic Hoops: The Transfer Game-Changer
For garment embroidery, maintaining perfect tension during transfer and stitching is crucial. MaggieFrame magnetic embroidery hoops shine here:
- Even Tension, No Hoop Burn: The powerful magnetic system holds fabric taut across the entire hoop, preventing distortion and eliminating those dreaded hoop marks.
- Quick Setup: Snap your fabric in place in seconds—no fiddling with screws or risking misalignment.
- Ideal for Stabilizer Transfers: When using wash-away or sticky stabilizers, MaggieFrame’s even pressure ensures the design stays perfectly aligned from transfer to final stitch.
6. Material and Stitch Selection Strategies
The magic of embroidery happens at the intersection of stitch, fabric, and color. Whether you’re after bold outlines, painterly fills, or textured details, choosing the right stitches and materials is your secret weapon.
6.1 Stitch Libraries: From Satin to Needle Painting
Embroidery stitches are like colors on a painter’s palette—each brings its own texture and flair. Here’s how to build your stitch arsenal:
Outline Stitches
- Stem Stitch: Smooth, rope-like lines—ideal for curves and stems.
- Chain Stitch: Linked loops create a bold, decorative outline.
- Backstitch: Crisp, precise lines—perfect for text or fine details.
Fill Stitches
- Long-and-Short Stitch: The go-to for needle painting and realistic shading.
- Satin Stitch: Smooth, glossy fills—great for monograms, petals, or logos.
- Basket Weave: Adds subtle texture and depth.
Knots
- French Knot: Tiny, raised dots—use for flower centers or textured accents.
- Bullion Knot: Elongated coils—fantastic for roses or textured borders.
Decorative Techniques
- Needle Painting: Layer long-and-short stitches in varying shades for lifelike effects (think fur, feathers, or florals).
- Printify’s Color Limit: For clarity, stick to six colors or fewer per design—too many shades can muddy the result.
Pro Tips:
- Simplify for Clarity: Overly complex designs can lose detail—streamline where possible.
- Text Size Matters: For machine embroidery, keep lowercase letters above 0.25" and uppercase above 0.3" for legibility.
Realism Techniques: Want to mimic a photograph or create lifelike textures? Needle painting and careful color blending are your best friends. Start with a simple outline, then build up layers using long-and-short stitches, adjusting shades gradually for depth.
6.2 Fabric and Hoop Compatibility Guide
Not all fabrics are created equal—and neither are hoops. Here’s how to match your materials for flawless results:
Fabric Types & Tension Adjustments
| Material | Recommended Stitch Density | Design Complexity |
|---|---|---|
| Medium/Heavy Woven | Standard | Moderate |
| Thin/Stretchy | Light | Minimal |
| Leather/Vinyl | Very light | Minimal |
| Terry Cloth | Moderate | Avoid small details |
Adapted from industry guidelines
The MaggieFrame Advantage for Garment Embroidery
- PPSU Engineering Plastic: MaggieFrame magnetic embroidery hoops use high-grade PPSU plastic, which resists warping and cracking—even after thousands of uses.
- Even Pressure: The magnetic system distributes tension perfectly, preventing distortion on challenging fabrics like denim or towels.
- Reduced Defects: Uniform tension means fewer puckers, misalignments, and up to 15% fewer defects in finished garments.
- No Hoop Burn: Unlike screw-tightened hoops, MaggieFrame’s smooth, even grip leaves your fabric pristine.
Why Compatibility Matters: Stretch fabrics (like jersey) and thick materials (like terry cloth) are notorious for shifting or distorting during stitching. MaggieFrame’s magnetic hoops adapt instantly to different thicknesses, holding everything flat and stable—so your stitches land exactly where you want them.
Pro Tips:
- Always Test: Try a small sample before committing to a full project, especially with new fabrics.
- Choose the Right Size: Use a hoop that fits your design closely—too large, and you risk slack; too small, and you’ll need to reposition frequently.
Embroidery is equal parts art and engineering. With the right digitizing software, free pattern tools, transfer techniques, and material strategies, you’ll be ready to tackle any project—from pixel art pouches to heirloom garments—with confidence and style. And when it comes to garment embroidery, MaggieFrame magnetic hoops are the professional’s secret for flawless, frustration-free results.
7. Advanced Execution and Troubleshooting
Embroidery is more than just art—it's a dance between creative vision and technical mastery. When your pattern ambitions outgrow a single hoop or when fabric tension threatens to distort your masterpiece, it’s time to level up your skills. Let’s dive into advanced techniques for resizing designs across multiple hoops and banishing distortion for good.
7.1 Resizing Designs for Multi-Hoop Projects
Ever found the perfect pattern, only to realize it’s too big for your hoop? Or maybe you want to scale a design for a larger garment, wall hanging, or quilt block. Resizing embroidery designs—especially for multi-hoop projects—requires both strategic planning and a dash of technical know-how.
Proportional vs. Unproportional Scaling
When resizing, you have two main options:
| Method | Pros | Cons |
|---|---|---|
| Proportional Scaling | Maintains stitch density and aspect ratio | Limited by hoop size |
| Unproportional Scaling | Adjusts width/height independently | Risk of stitch distortion (e.g., stretched satin stitches) |
| Hoop Size Adaptation | Larger hoops enable bigger designs | Requires machine compatibility |
Machine-Based Resizing
Modern embroidery machines like the BERNINA 570 let you scale designs up to 400% proportionally—no extra software required. Simply pull up your design, use the built-in knobs to adjust size, and watch as the stitch count updates automatically. If you unlink width and height, you can stretch or compress the design, but beware: unproportional scaling can lead to odd-looking stitches or gaps, especially in satin stitch areas.
A helpful trick: If your resized design exceeds the hoop’s boundaries, the machine will highlight the edges in red, signaling you to either shrink the design or switch to a larger hoop. Always center your design after resizing to avoid off-center stitching.
Software Adjustments
For more control, use embroidery software like Hatch. Here, you can tweak stitch density, length, and angle to maintain quality after resizing. This is especially useful when adapting a design for different fabrics—reduce stitch density for delicate silks, or beef it up for sturdy denim.
Appliqué Workarounds
Need to go even bigger? Use appliqué techniques:
- Stitch placement lines and tack-down stitches for each hoop section.
- Trim excess fabric after each section, then rehoop for finishing stitches.
- This method lets you piece together oversized designs seamlessly.
Case Study: “Cats Meow” Wall Hanging
A user wanted to enlarge a digital cat design for a wall hanging. They:
1. Edited the file in software to maintain stitch quality after scaling.
2. Used appliqué placement and tack-down stitches to manage oversized sections.
3. Rehooped after trimming, ensuring each segment aligned perfectly.
Best Practices:
- Always test resized designs on scrap fabric first.
- Match design size to your machine’s hoop capacity (e.g., 5×7 inches for Brother PE770).
- Use stabilizers to prevent shifting during multi-hoop projects.
Resizing is like fitting a grand symphony into a single score—when done right, every note lands perfectly, no matter how big the stage.
7.2 Solving Distortion and Tension Issues
Nothing derails an embroidery project faster than distortion—those puckers, waves, or gaps that appear when fabric tension goes awry. But with the right tools and techniques, you can keep your stitches crisp and your fabric flat, even on the trickiest materials.
Common Distortion Culprits:
- Stitch Density Loss: Over-resizing reduces stitch count, leaving sparse coverage.
- Aspect Ratio Distortion: Unproportional scaling stretches designs unevenly.
- Fabric Shifting: Loose hoop tension or thick fabrics can cause misalignment.
Troubleshooting Solutions:
- Adjust stitch length and spacing in your software to compensate for scaling.
- Use proportional scaling whenever possible, or split large designs into multiple hoopings.
- Apply wash-away or tear-away stabilizers to keep fabric steady.
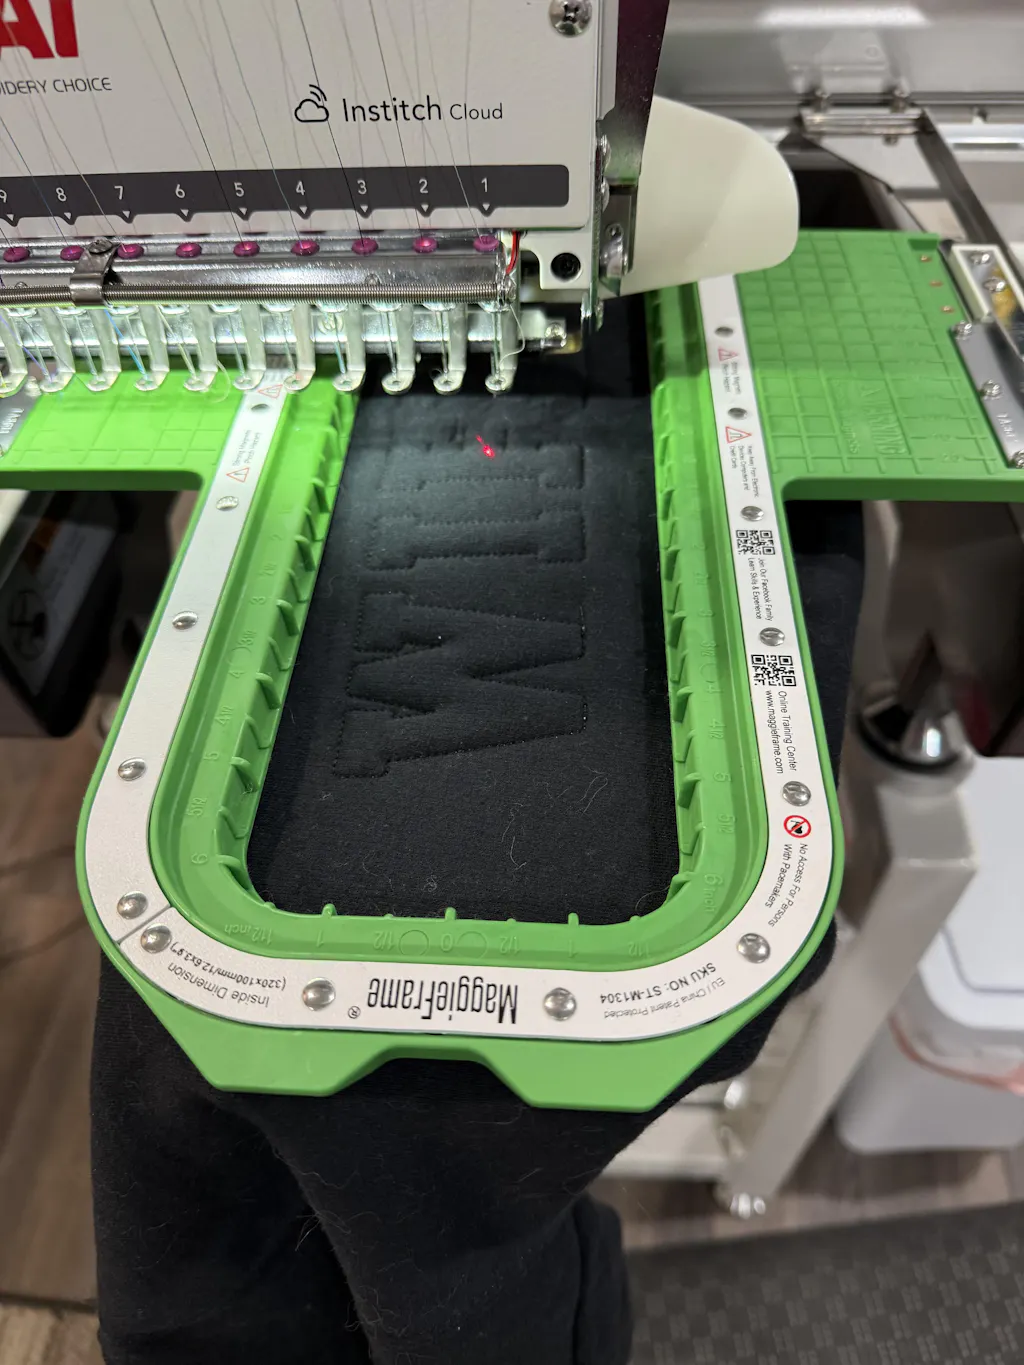
MaggieFrame Magnetic Hoops: The Distortion Buster
For large-scale projects, an industrial embroidery machine paired with MaggieFrame ensures precision. MaggieFrame magnetic embroidery hoops are engineered for this very challenge:
- High-Strength Magnets (N50 Grade): These magnets hold your fabric taut and stable, even during complex, high-density stitching.
- Even Pressure Distribution: The magnetic system ensures uniform tension, preventing puckers and misalignment that can plague traditional screw hoops.
- Effortless Setup: Snap your fabric in place—no wrestling with screws or risking hoop burn.
When working on plush towels, dense denim, or multi-layered garments, MaggieFrame’s robust magnetic grip keeps everything exactly where it belongs, so you can focus on creativity—not crisis management.
Best Practices:
- Test stitch on scrap fabric to check for distortion before starting your main project.
- Use stabilizers appropriate for your fabric type and design complexity.
- For especially challenging fabrics, MaggieFrame hoops offer a professional edge, keeping your work smooth from first stitch to last.
Embroidery is a blend of art and engineering. With the right resizing strategies and tension control, your designs will always look as good on fabric as they do in your imagination.
8. Conclusion: Your Path to Custom Embroidery Mastery
Embroidery pattern creation is both an art and a science—one that rewards curiosity, experimentation, and the right tools. Whether you’re digitizing designs with beginner-friendly software, mastering transfers with stabilizers, or pairing stitches and materials for the perfect finish, each step brings you closer to creative mastery. Don’t hesitate to explore free resources, try new techniques, and invest in tools that make your process smoother and more efficient. With every project, you’re not just stitching a pattern—you’re building your own embroidery legacy.
9. FAQ: Embroidery Pattern Essentials
9.1 Q: What’s the best no-draw method for creating embroidery patterns?
A: Canva’s pattern generators are a top choice—just enter a prompt and let the tool craft a stitch-ready design, no drawing required.
9.2 Q: What’s the minimum text size for embroidery patterns?
A: For clear, legible results, keep lowercase letters above 0.25 inches and uppercase above 0.3 inches.
9.3 Q: How do you remove Frixion pen marks from fabric?
A: Simply apply a hot iron to the marked area—heat makes the ink vanish like magic.
9.4 Q: What’s the best way to transfer patterns onto dark fabric?
A: Use a white gel pen or chalk to trace your design for high visibility on dark materials.
9.5 Q: Are there stabilizer alternatives for transferring patterns?
A: Yes—learn how to use an embroidery hoop effectively with carbon paper transfers, a cost-effective alternative to special stabilizers.